Historical Context
First Anglo-Boer war, 1880-1881
This was a struggle between the Boer republics and the British who were attempting to annex their territory and bring them into a British ruled confederation. After initial setbacks the British government despatched reinforcements. Their deployment provoked hostility across South Africa. Eventually a negotiated peace resulted, which conceded independence to the Transvaal. This peace was short lived and led to the second Boer war.
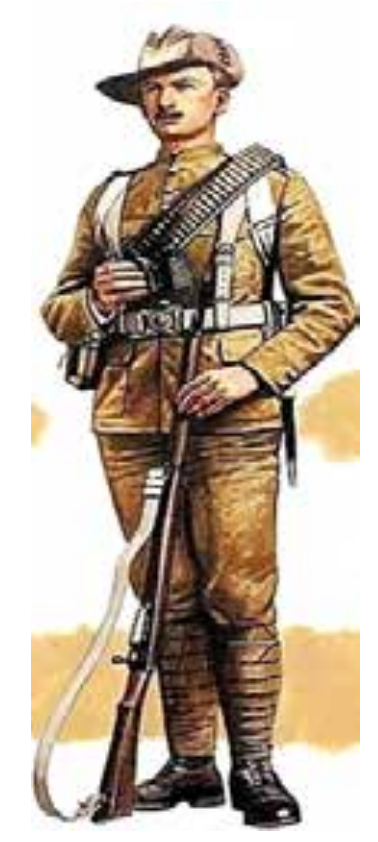
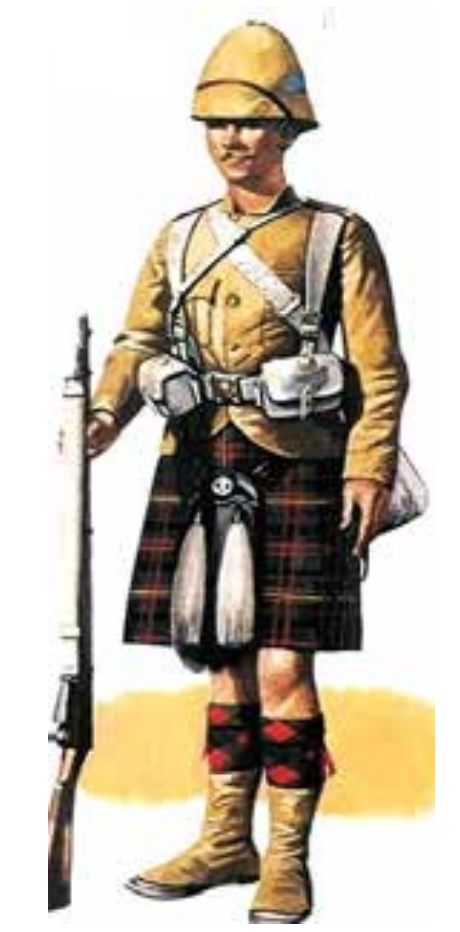
The British uniform at the time of the first war was red tunics and dark blue trousers which made them easy targets for Boer marksmen. The lesson was learned and khaki was introduced in time for the second conflict.
Second Anglo-Boer war, 1899-1902
The origins of the second Boer war lay, as with the first, in the British desire to again unite the British South African territories and the Boer republics of the Orange Free State and Transvaal. Between 1899 and 1902 the British fought a bitter colonial war in South Africa. Although outnumbered, the Boers were a skilled and determined enemy. After initial setback and a long period of guerilla warfare, the British eventually prevailed, but not without adopting controversial tactics.
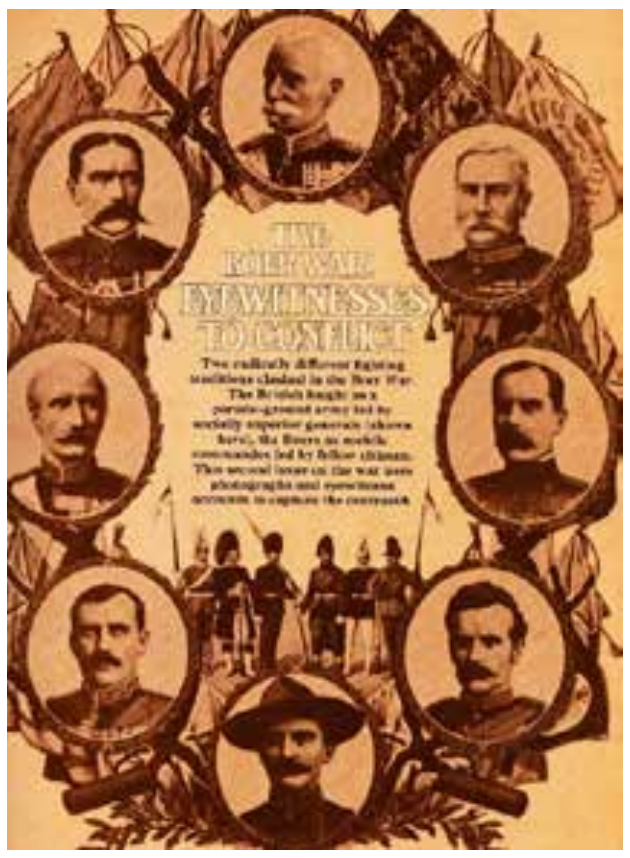
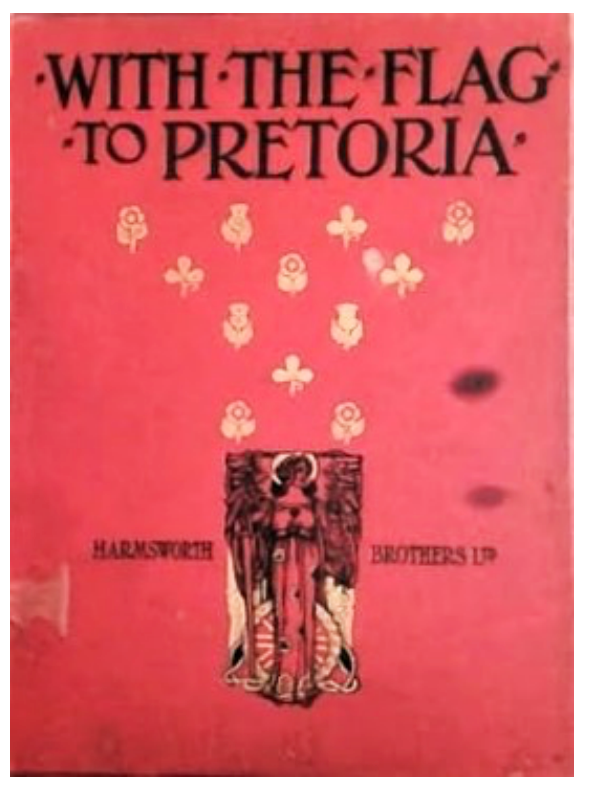
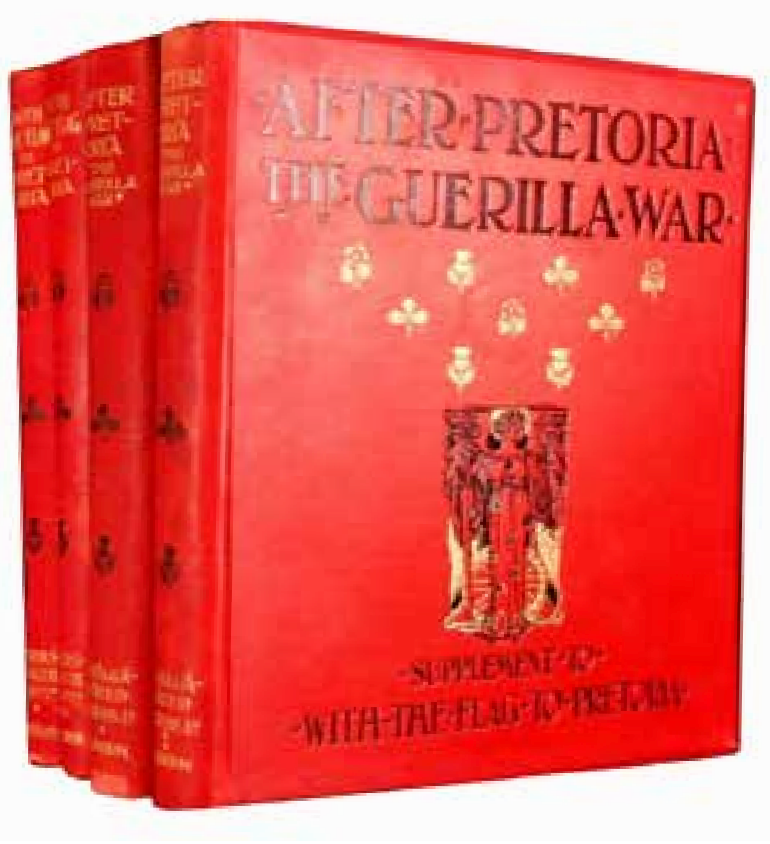
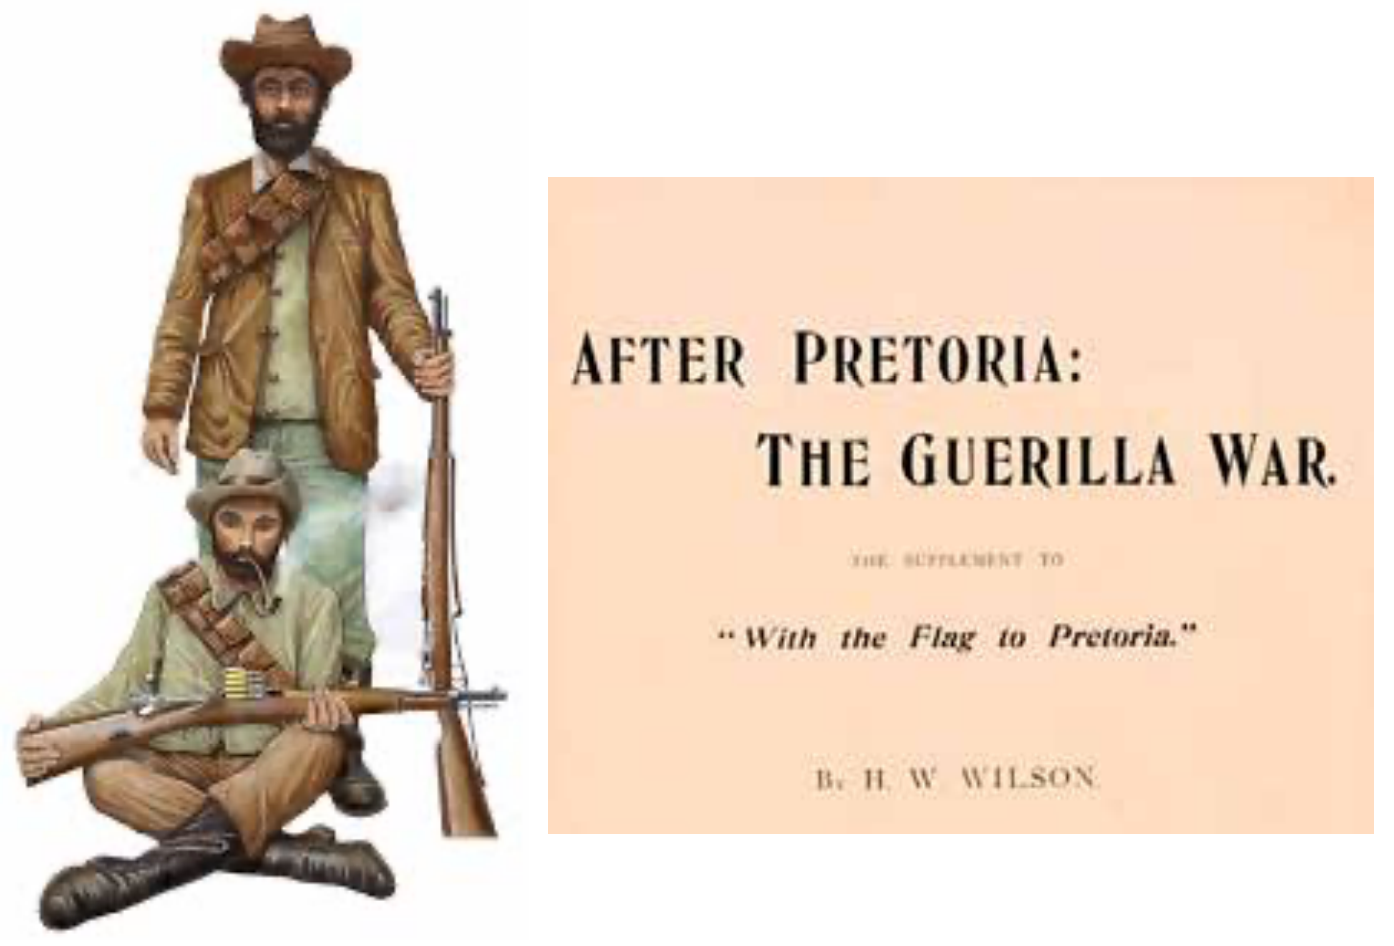
Events in both wars were closely followed back home in Great Britain, with many magazines and books being published during and after the conflict, full of dramatic illustrations. The first two volumes of the set – With the Flag to Pretoria were published by Harmsworth Brothers, London in 1901. The second two volumes- After Pretoria, The Guerilla War were published by the Amalgamated Press, London in
1902.

The Boer Republics, Orange Free State and the Transvaal
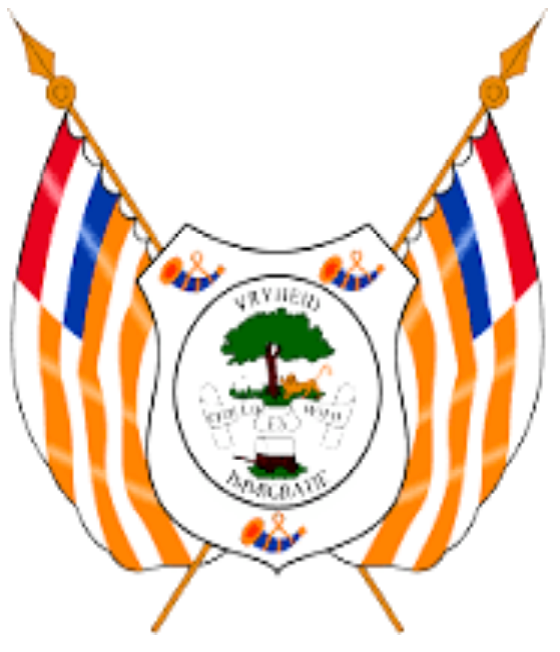
These were self-governing republics formed by Dutch speaking inhabitants who trekked north from the Cape Colony. The founders, named Boers or Voortrekkers, settled mainly in the middle north and northeast parts of present day South Africa.
The Orange Free State was first to declare statehood in 1854, followed by the Transvaal Republic, which existed from 1852 until 1902 when it was annexed into the British Empire. Both republics ceased to exist after 1902 at the end of the war.
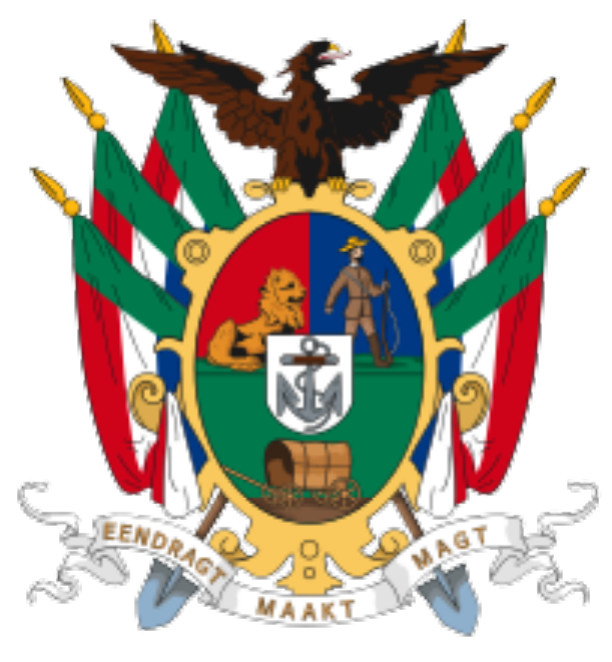
There were not enough funds available for the republics to form a regular army. Although the Transvaal had a uniformed artillery unit –Transvaalse staatartillerie (state artillery regiment) they also relied on uniformed police and volunteer civilian commando units for defence.
The state artillery performed well in the beginning of the conflict but, due to lack of ammunition and changing strategy, the guns were dumped and they were reorganised as a mounted infantry unit (some just became infantry). These were the uniformed infantry and cavalry regiments –Sets #6 and #26 that Britains chose to represent as the opposition (see below).
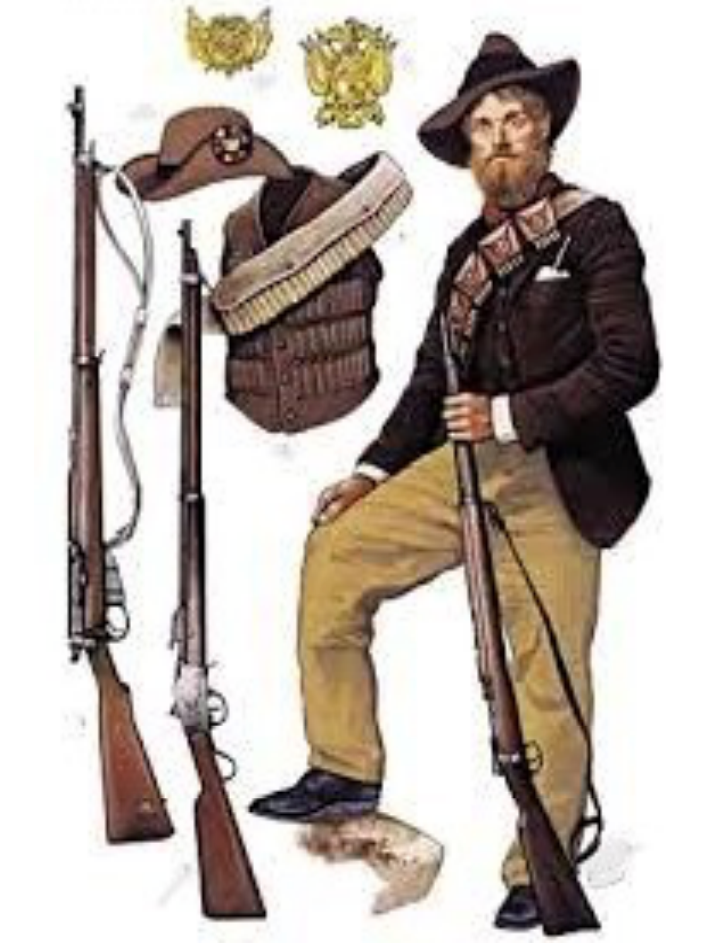
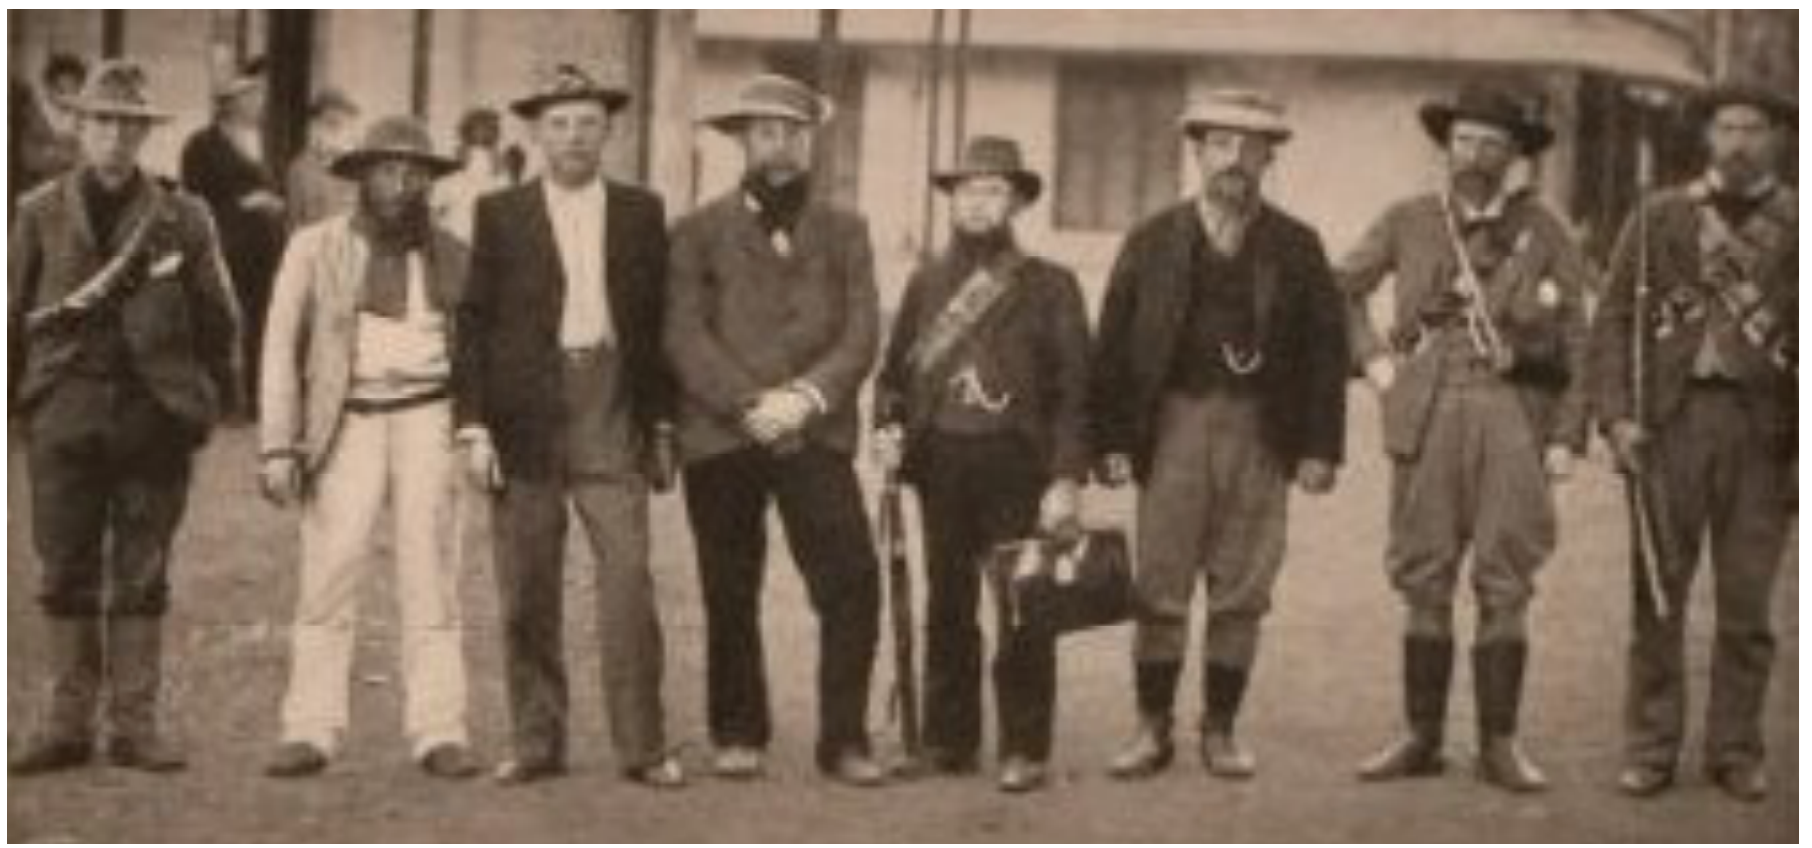
The Boer commando were volunteer military units. In both republics commando service was mandatory in times of need, they formed the backbone of the Boer forces. Each commando was attached to a town, after which it was named. They were highly mobile, adept at field-craft and used to life on the veldt. Generally, they wore no uniform, only everyday working clothes, often of shabby appearance. Although the Boers had only around 90,000 soldiers, they were led by outstanding Generals such as Botha, Smuts and De Wet. After peace was declared in 1902 the commandos were disbanded.
The Empire strikes back.
After several reverses, the British mobilised their superior resources and sent more men to South Africa. These included troops from across the British Empire. Eventually over 400,000 soldiers were involved. Following the end of the sieges in the initial phases of the war, the tide gradually turned in Britain’s favour. By the end of May 1900 the British had overrun the Orange Free state and by October the Transvaal. In September 1900 Lord Kitchener took over as Commander in Chief.
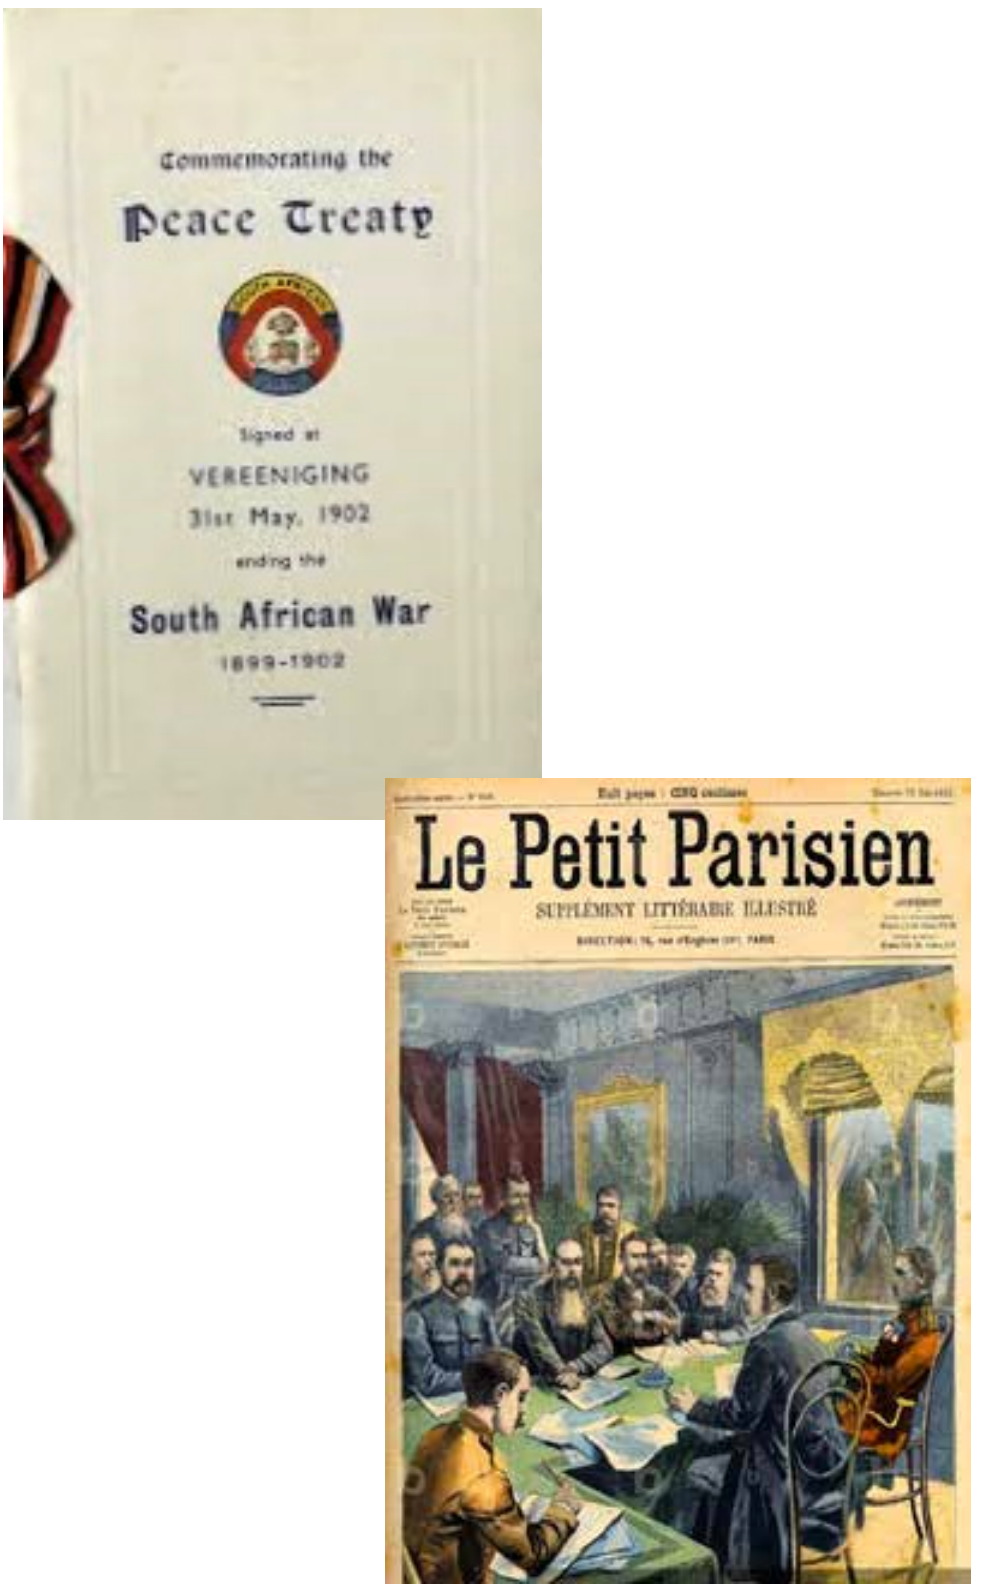
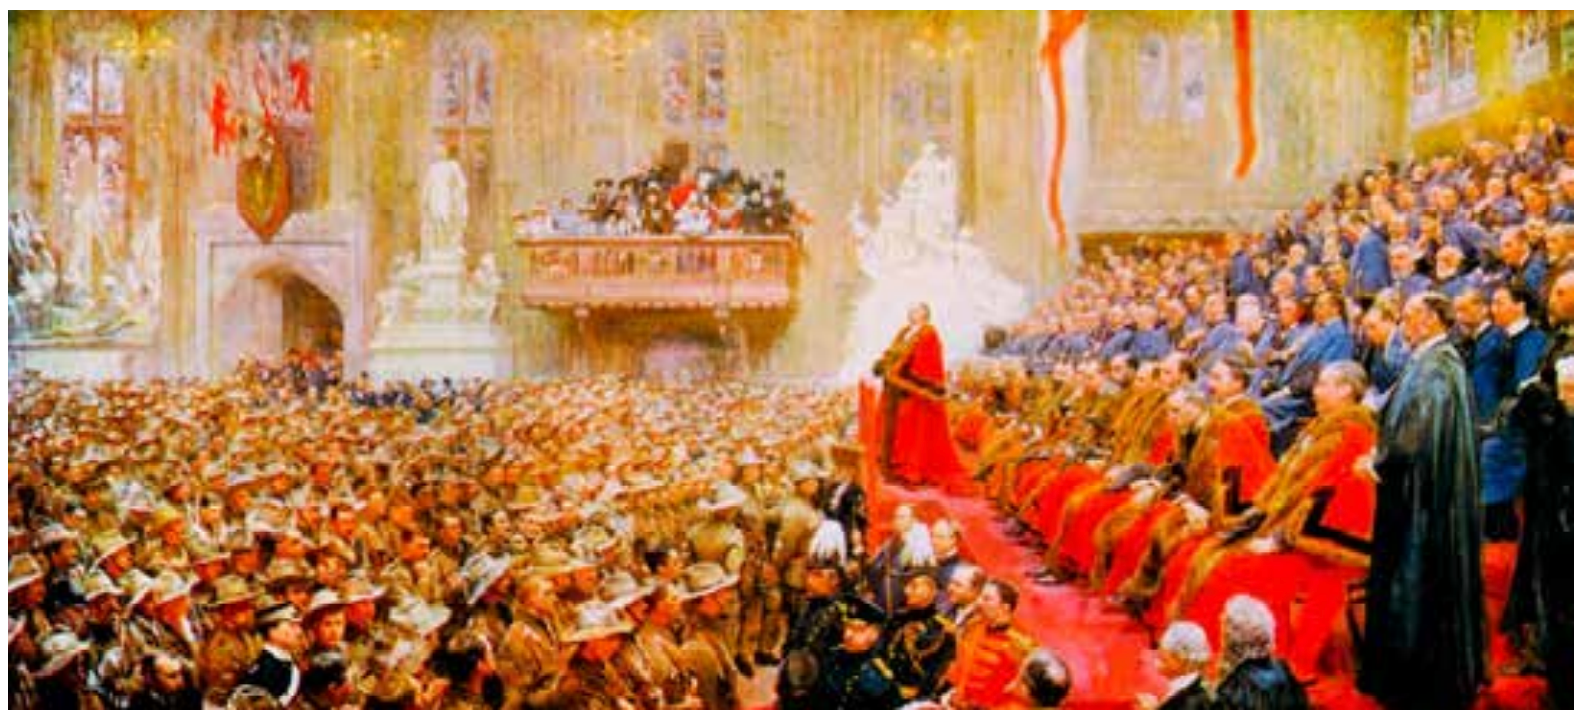
signing of the peace treaty making the front page of this
French newspaper in 1902.
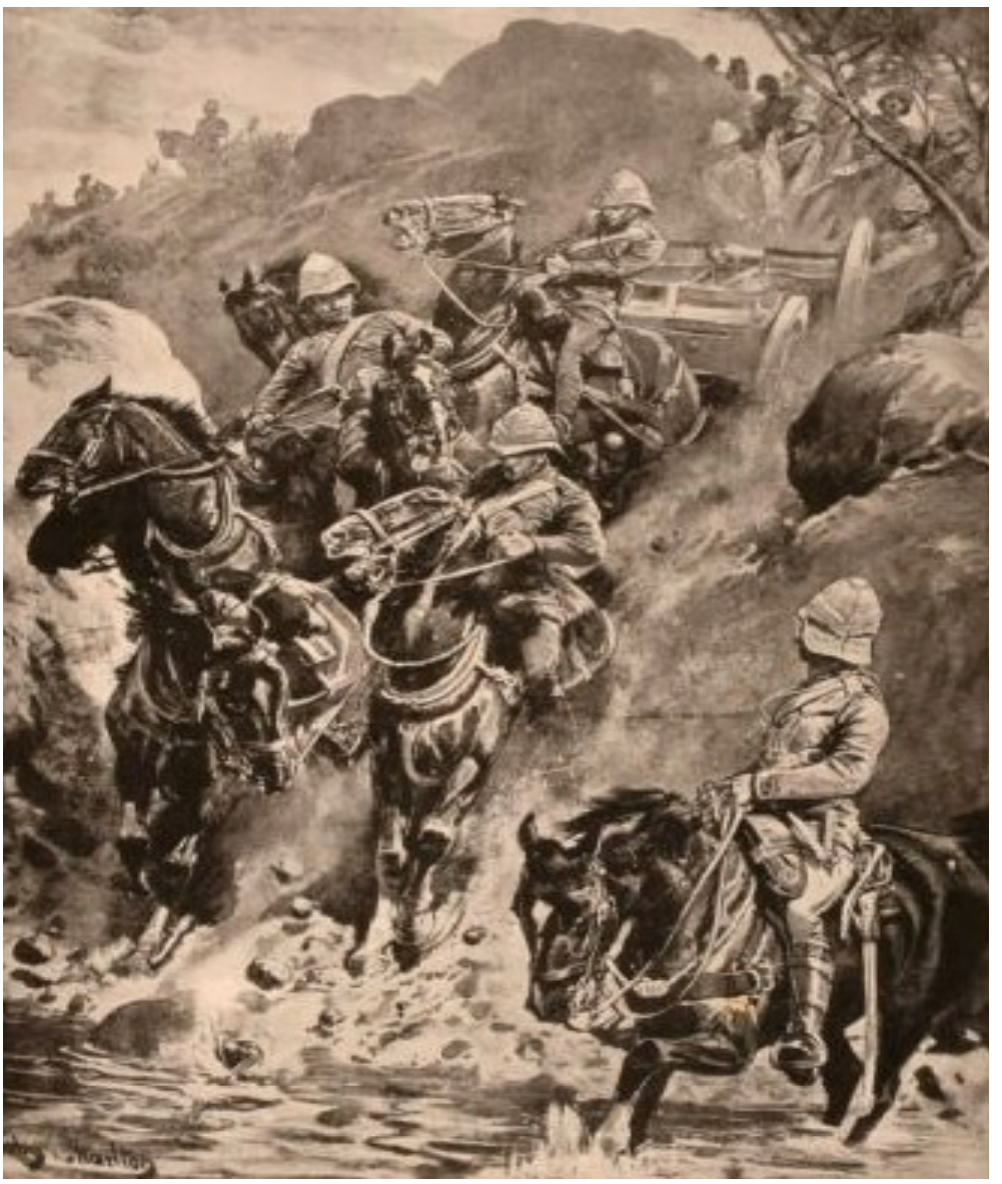
The Guerilla War
Many Boers fought on and eighteen months of guerilla warfare were to follow. To control the countryside, and restrict movement of those Boer commandos still active, the British built stone and corrugated blockhouses. These were maintained by garrisions with the objective of preventing the guerillas from obtaining supplies. The British burnt farms and destroyed crops and confined Boer families in a network of concentration camps where food and water were in short supply. Later on Kitchener reversed this policy, while regular troops and mounted infantry tracked down the remaining
Boers.
Peace Treaty
Eventually these policies forced the Boers to seek peace terms. On 31st May 1902 the treaty of Vereeniging was signed and the Boers accepted British sovereignty. The Boer republics were fully integrated into the union of South Africa in 1910.
Red coats reclad
It was during the first war that the British army first began to adopt khaki drill uniforms on a massive scale. The scarlet woollen tunics worn up until then proved impractical due to the heat and harsh conditions of South Africa. And with the advent of the bolt action rifle, with its increased accuracy, they made the soldiers easy targets. Britains Boer war figures reflect this change from red to khaki, with some sets available with uniforms in both colours.
Britains sets featuring the Boer war conflict
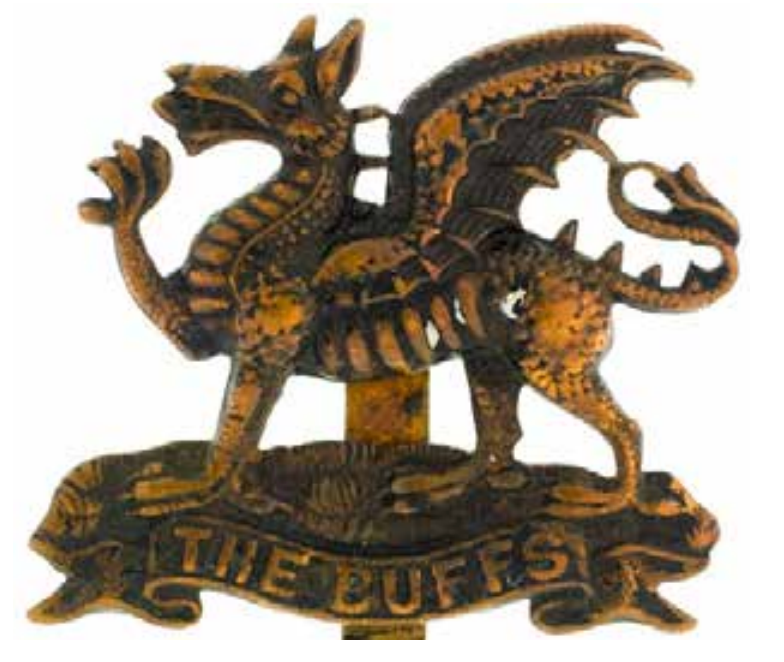
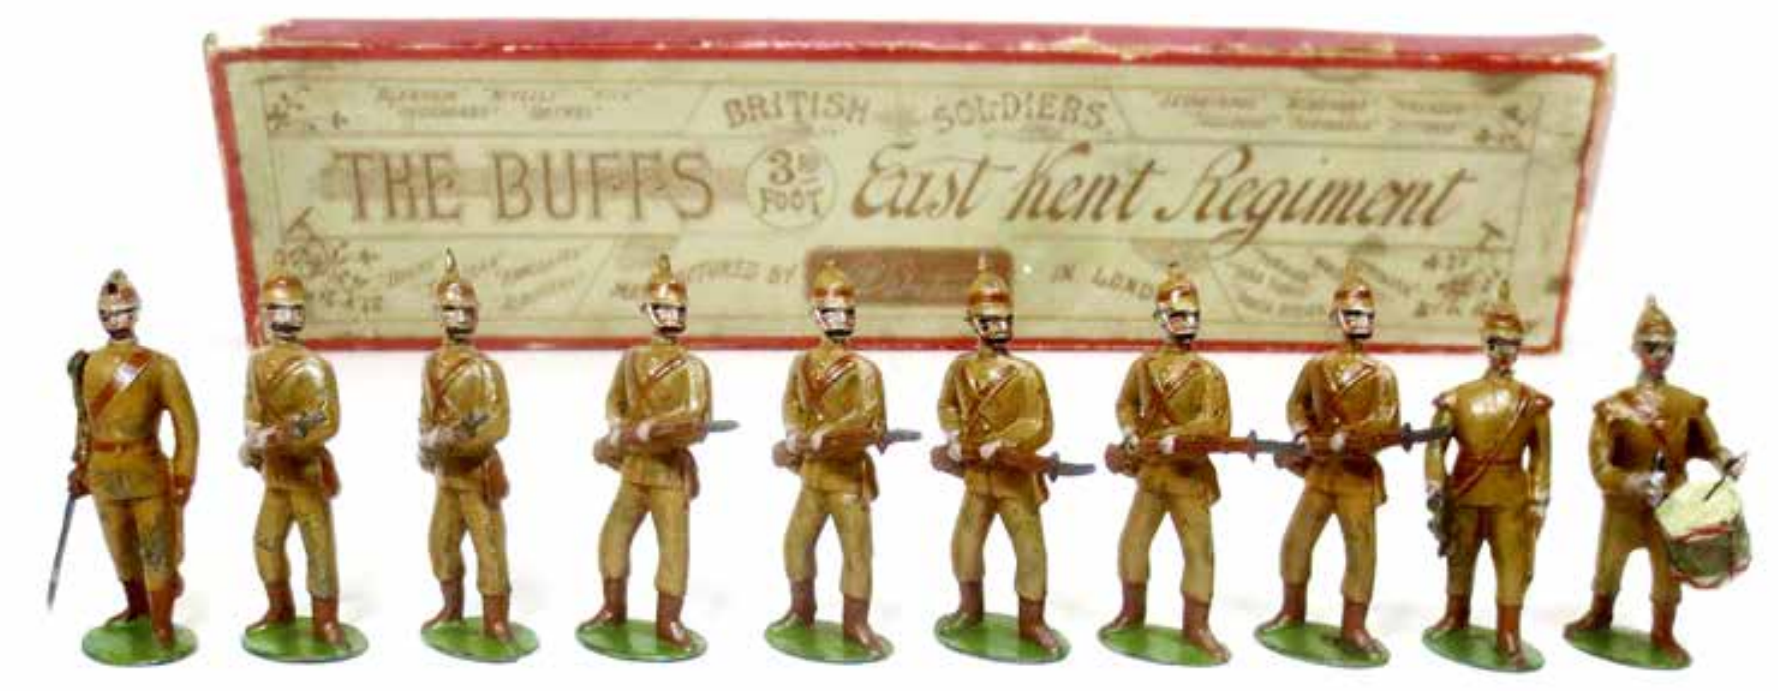
East Kent Regiment (the Buffs)
The East Kent Regiment’s origins date back to 1572, making it one of the British
Army’s oldest regiments. The 2nd, 3rd and 2nd Volunteer Battalions saw action during the Boer war, returning to Britain in 1902. The regiment was one of the first portrayed by Britains, set 16 being issued in 1893.
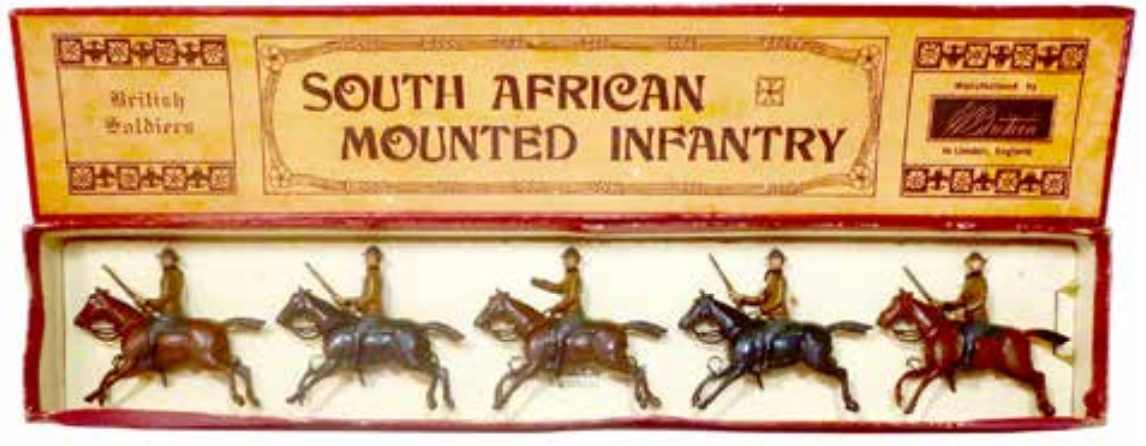
Dr. Jameson and the South African Mounted Infantry, 1899
This set was first issued in 1896 with a ‘’Dr. Jameson and the African Mounted Infantry’’ box label. It comprised a mounted officer with a pistol in hand, representing Dr. Jameson, accompanied by 4 troopers. The label on this set was deleted before 1899, when it was continued as simply The South
African Mounted Infantry.
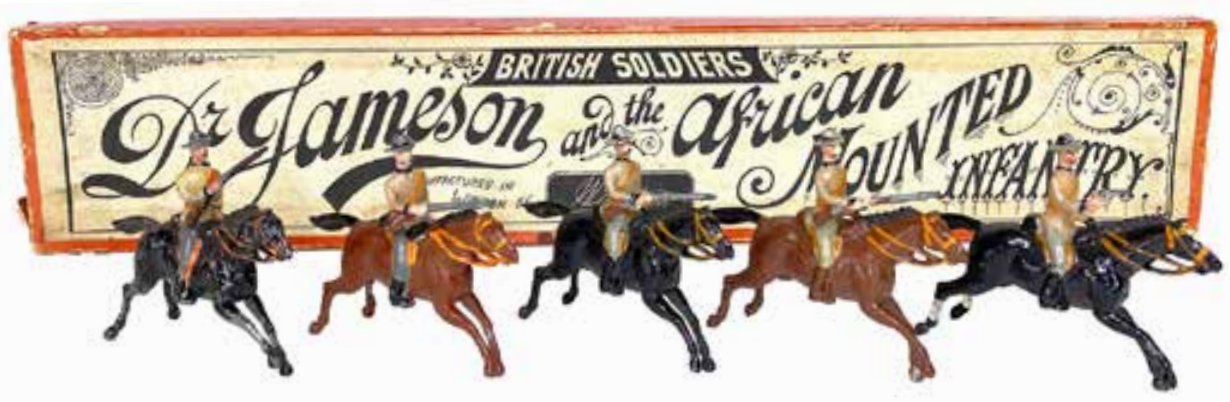
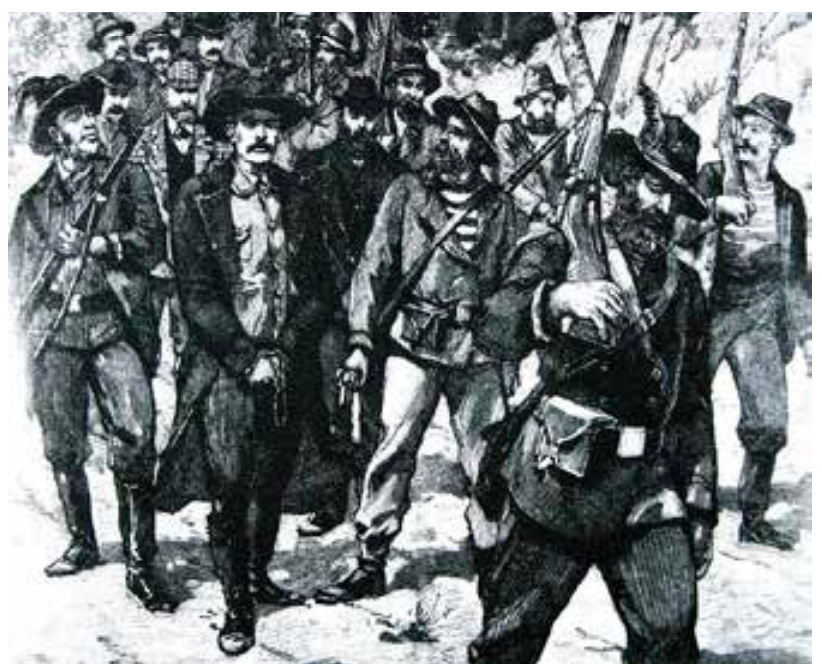
The Jameson raid of 1896 into the Transvaal was headline news at the time. It was an attempt to create an uprising amongst the outlanders (uitlanders/foreigners in afrikaans) who were an English speaking minority attracted to the goldfields in the Boer republics. The Boers saw them as a threat to their way of life. Lead by Doctor Jameson and his British South African troops, the failure of the raid was a humiliation, which led to a further deterioration of the relationship between the British and Boer governments. The accompanying Illustration shows Dr. Jameson being led off to captivity.
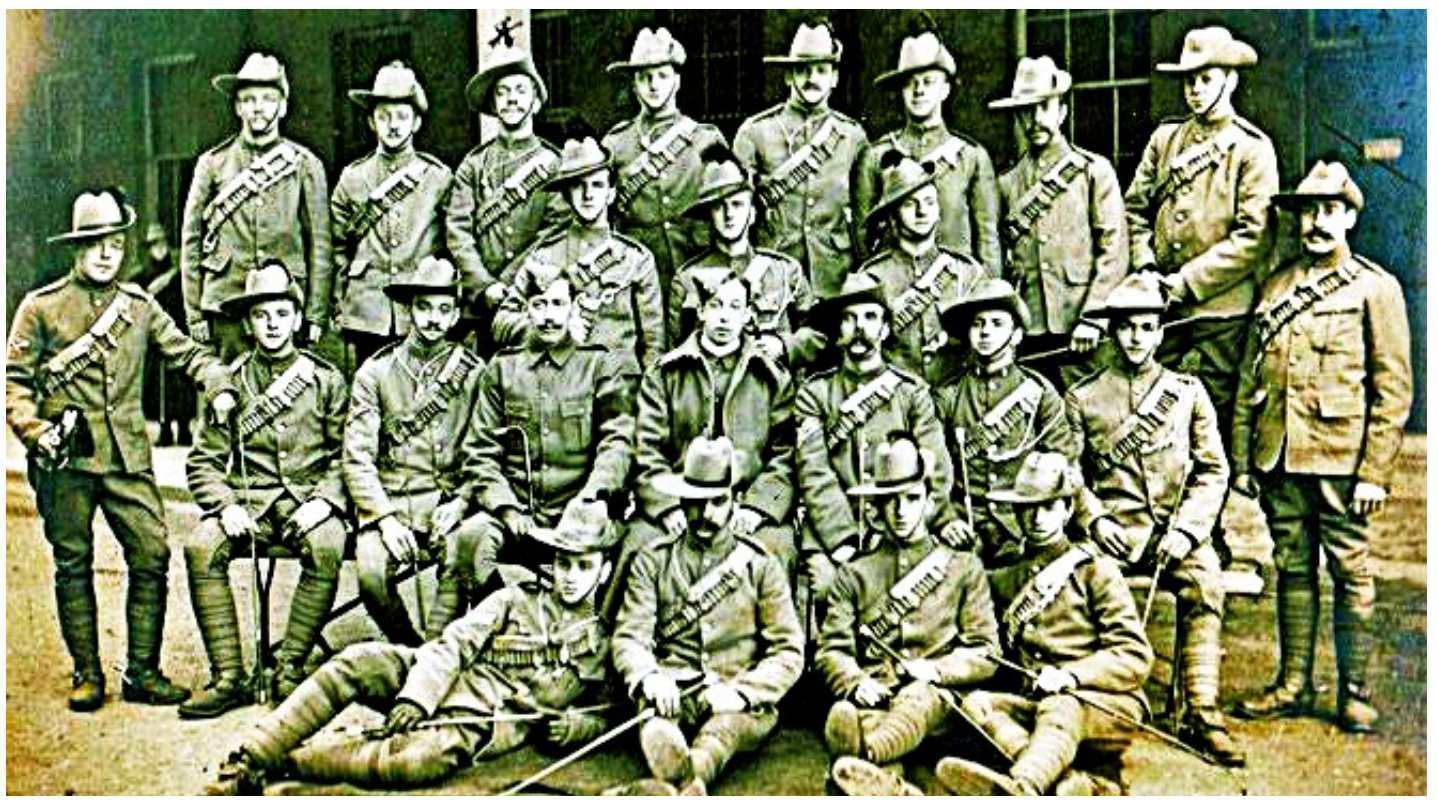
The South African Mounted Infantry Corps was formally raised by Major Thorneycroft, prior to the Battle of Colenso, 15th December 1899. It became famous in the course of the war. They were used mainly on patrol work. They were recruited locally, as they knew the terrain and environment. Mounted infantry were men trained and armed as infantry but with the mobility offered by a horse. All infantry battalions that arrived from Britain had to provide a mounted infantry company.
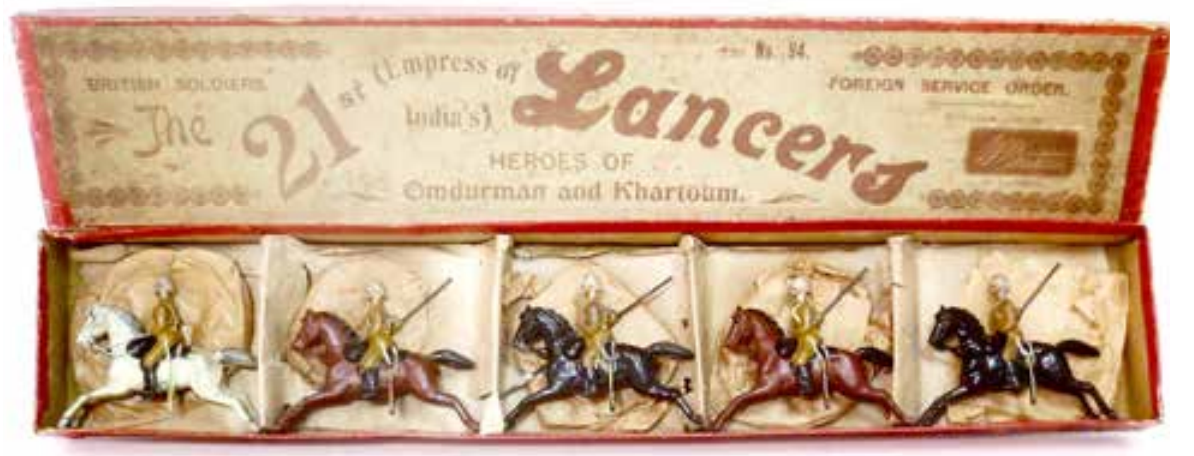
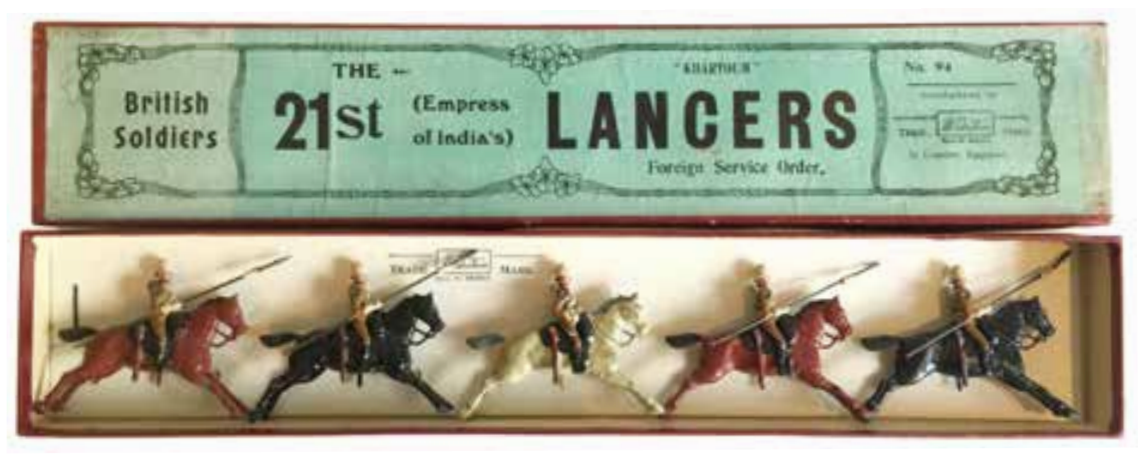
21st Lancers
This cavalry regiment was raised in 1858 by the East India company and soon after transferred to the British Army. Perhaps the regiment’s most famous engagement was at the Battle of Omdurman in the Sudan during the Mahdist war of 1898. The first Britains version of set 94 was issued in 1898, with a second version in 1901 and a further revision in 1916 (when the headgear was changed to steel helmets). In 1925 a remodelled horse was introduced. The set continued in this form until 1941.
Britains produced this set at the same time as they made sets representing units that actually fought in the War. Although the 21st Lancers were not involved directly, this set can be seen as an example dressed in the cavalry uniforms of the times, including sun helmets. The Regiment was stationed in Dublin in 1899 and served in Ireland for several years. In 1912 it was posted back to India.
Britains Set #94, 21st Lancers, were initially mounted on rocking horses (1898-1900). A one-eared galloping horse appeared in 1901. The headgear later changed to steel helmets in 1916. The final version was mounted on a two-eared horse in 1919, and this version continued until 1941.
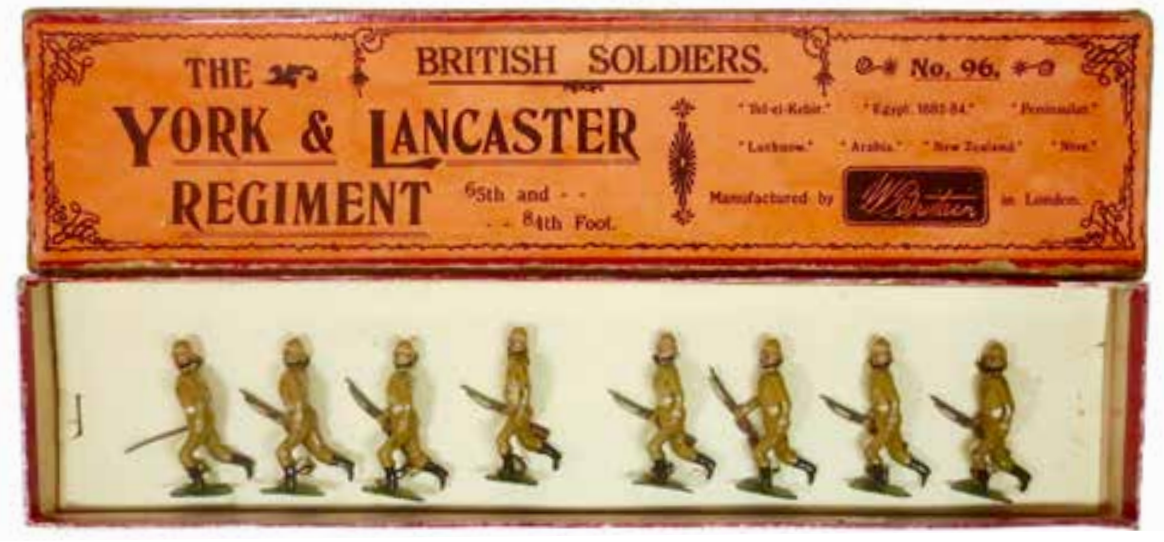
York and Lancaster Regiment
First formed in 1881, in 1891 the 2nd Battalion began a six year stint in South Africa. Fighting throughout the Boer war, its engagements included the relief of Ladysmith. The 1st Battalion
embarked for South Africa in late 1899. Following the end of the war in 1902 it was also sent to India.
In later versions of the set, a square based figure replaced the earlier ovalbased figure in 1907 and the troops were once more portrayed in traditional red jackets.

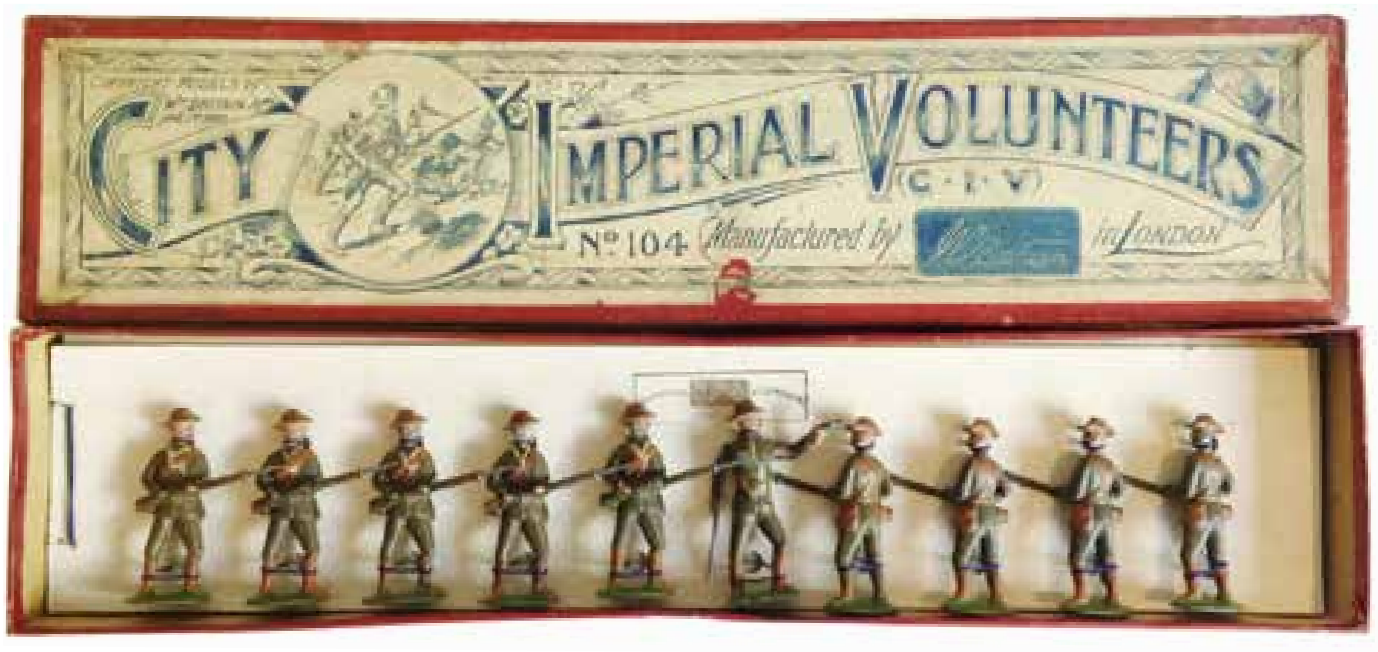
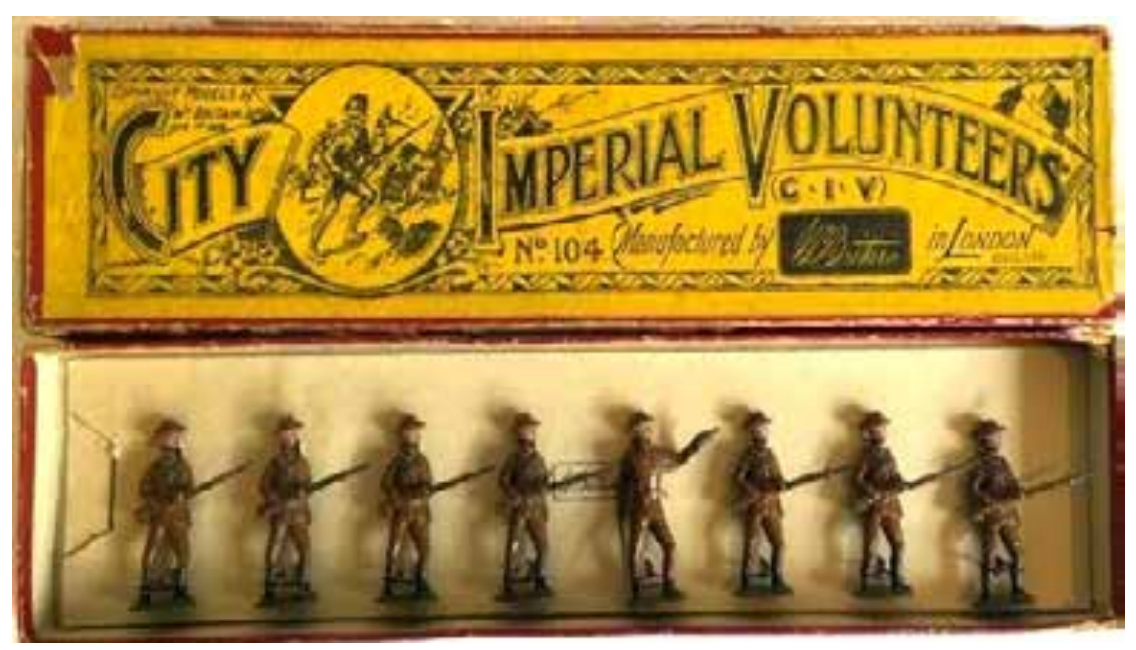
City of London Imperial Volunteers

After the outbreak of the second Boer war in October 1899, a proposal was put forward that the City of London should sponsor a volunteer troop of soldiers to take part in the conflict. A mixed force of infantry, cavalry and artillery was sent. The regiment took part in several engagements, returning in 1900 to a raptuous reception at Guildhall, London.
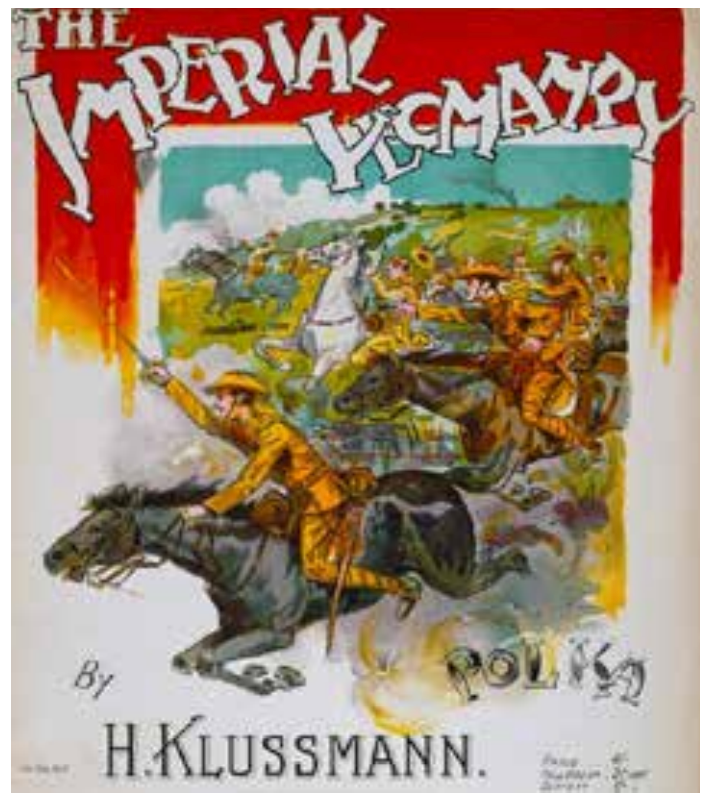
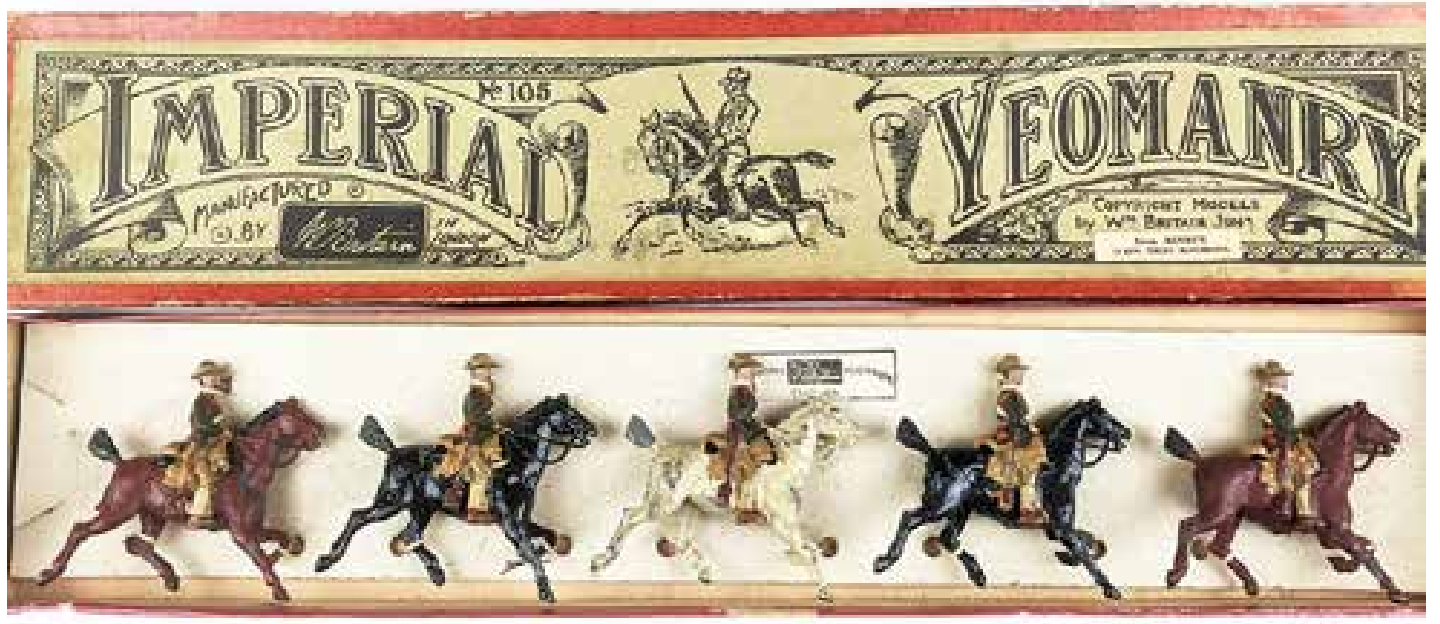
Imperial Yeomanry
The Imperial Yeomanry was a force of mounted infantry. It comprised volunteers from the UK, some drawn from existing Yeomanry Regiments. It was established in 1900, as a result of the war’s need for additional mounted infantry. They played a significant role in the war, contributing significantly to the British forces, suffering significant casualties. Britains Set #105, Imperial Yeomanry, was a fixed arm
cavalry set introduced in 1900. The same basic casting was used throughout. In the late 1930s a greener uniform appeared. The set continued to be made up to 1941.
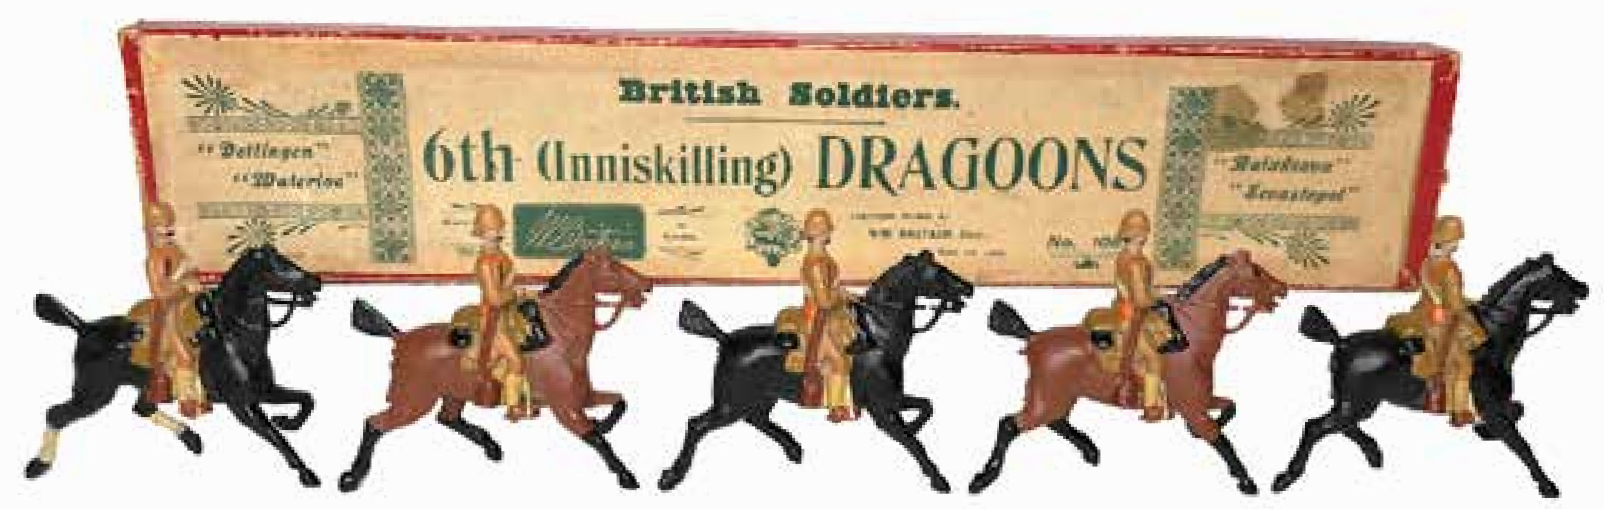
Inniskilling Dragoons
This cavalry regiment was raised in Ireland in 1689. It continued in British army service until 1922. It fought in the Boer war, taking part in the relief of Kimberly (1900) and the anti-guerilla operations at the end of the conflict.
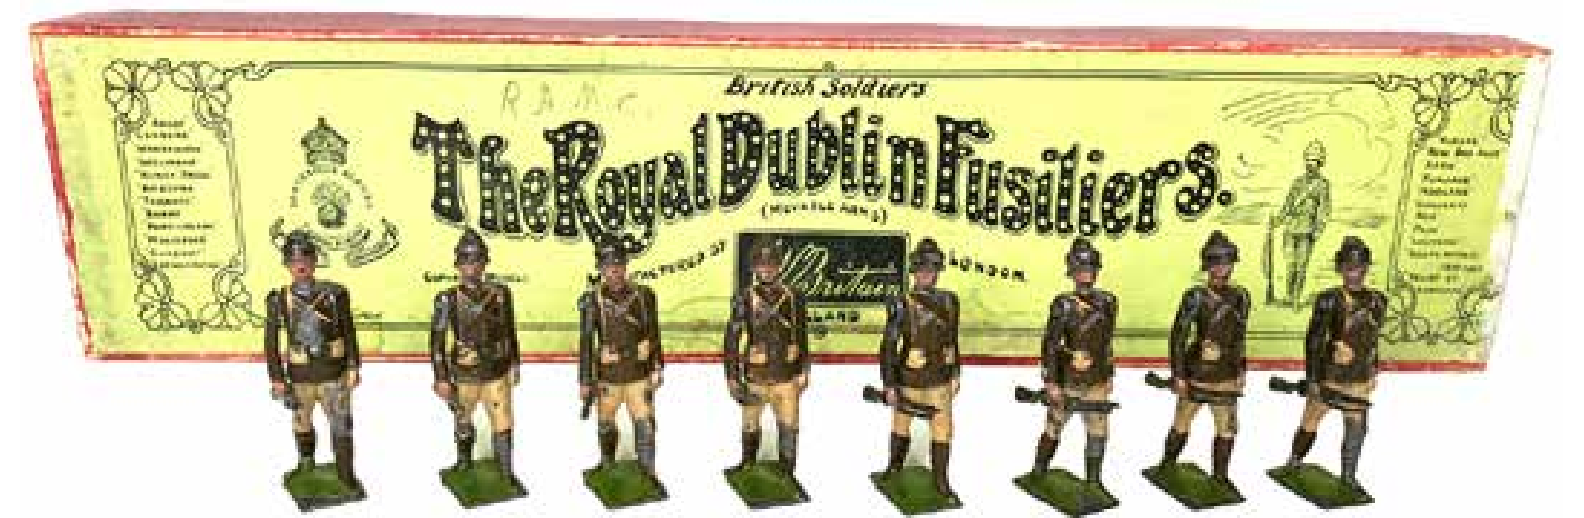
Royal Dublin Fusiliers
The 2nd Battalion was deployed to South Africa in 1899 and took part in the Siege of Ladysmith and the battle of Colenso and Tugela heights. A detachment was escorting an armoured train carrying Winston Churchill when it was ambushed and Churchill and the detachment were captured. The regiment was disbanded in 1922.
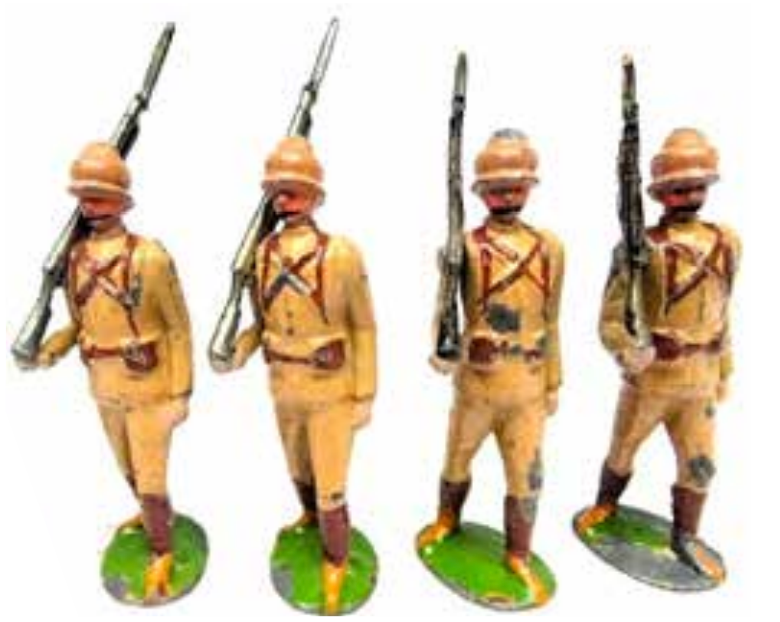
Britains Set #109, Dublin Fusiliers in Active service order was introduced in 1901. The figures at the trail had oval bases and smooth helmets. In 1910 a second version was introduced which had rectangular bases. By then a puggaree had been added to their helmets. Initially the figures were portrayed wearing Slade-Wallace equipment (1888 pattern). This proved unpopular with the troops and was later replaced by the 1908 pattern webbing. In 1916 a new larger figure wearing the improved webbing equipment was issued by Britains. Throughout, the tunics were painted with a much darker shade of khaki than the trousers. The larger figure was continued until 1941.
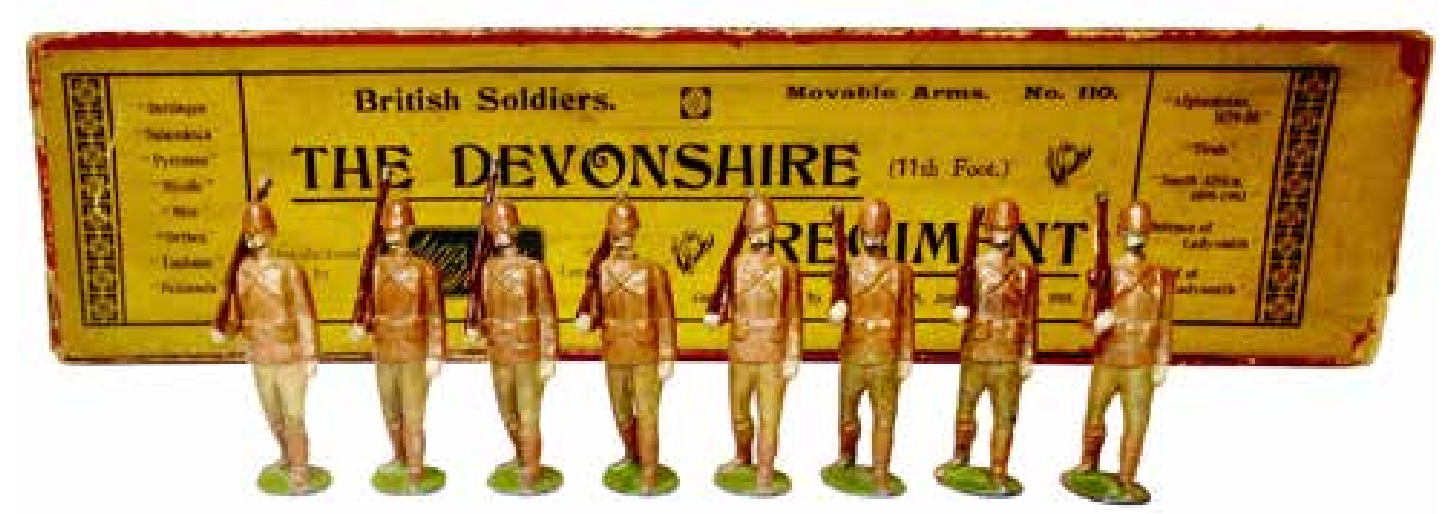
The Devonshire Regiment
The unit was raised in 1685. Both Battalions of the regiment were sent to South Africa in 1899, where the regiment’s engagements included Colenso and Spion Kop.
Britains Set #110, Devonshire Regiment, Active service dress, used the same body casting as the Dublin Fusiliers. First introduced in 1901, by 1904 a pugaree was added to the helmet. The bases then became rectangular in 1910. The set was continued up to 1941.
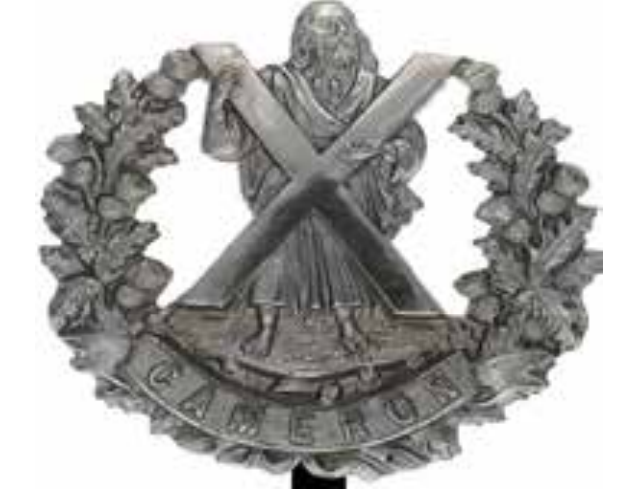
Queens Own Cameron Highlanders
This Scottish infantry regiment was formed in 1793. It was composed mainly of volunteers from the
Cameron Highland clan. It sailed for South Africa in 1900 and served in the Cape Colony, Orange Free State and Transvaal. At the end of hostilities, they returned home in 1902.
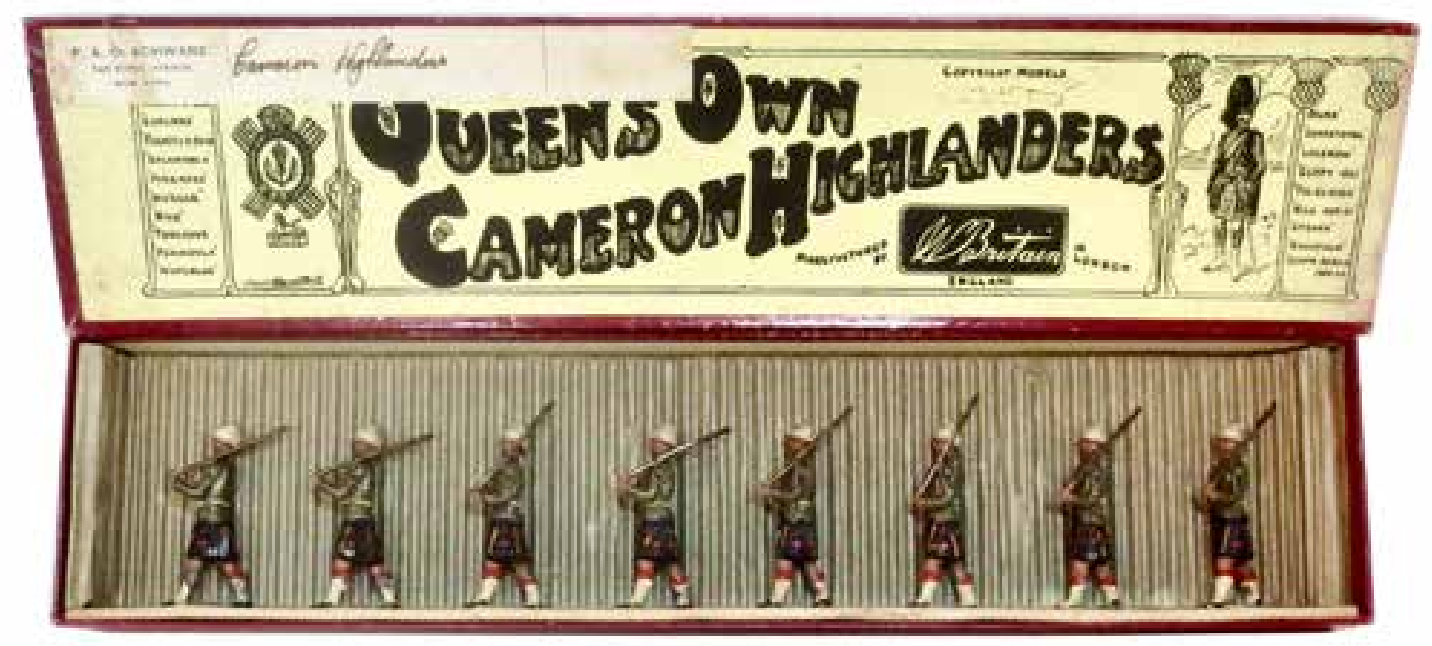
Regiment, 1900
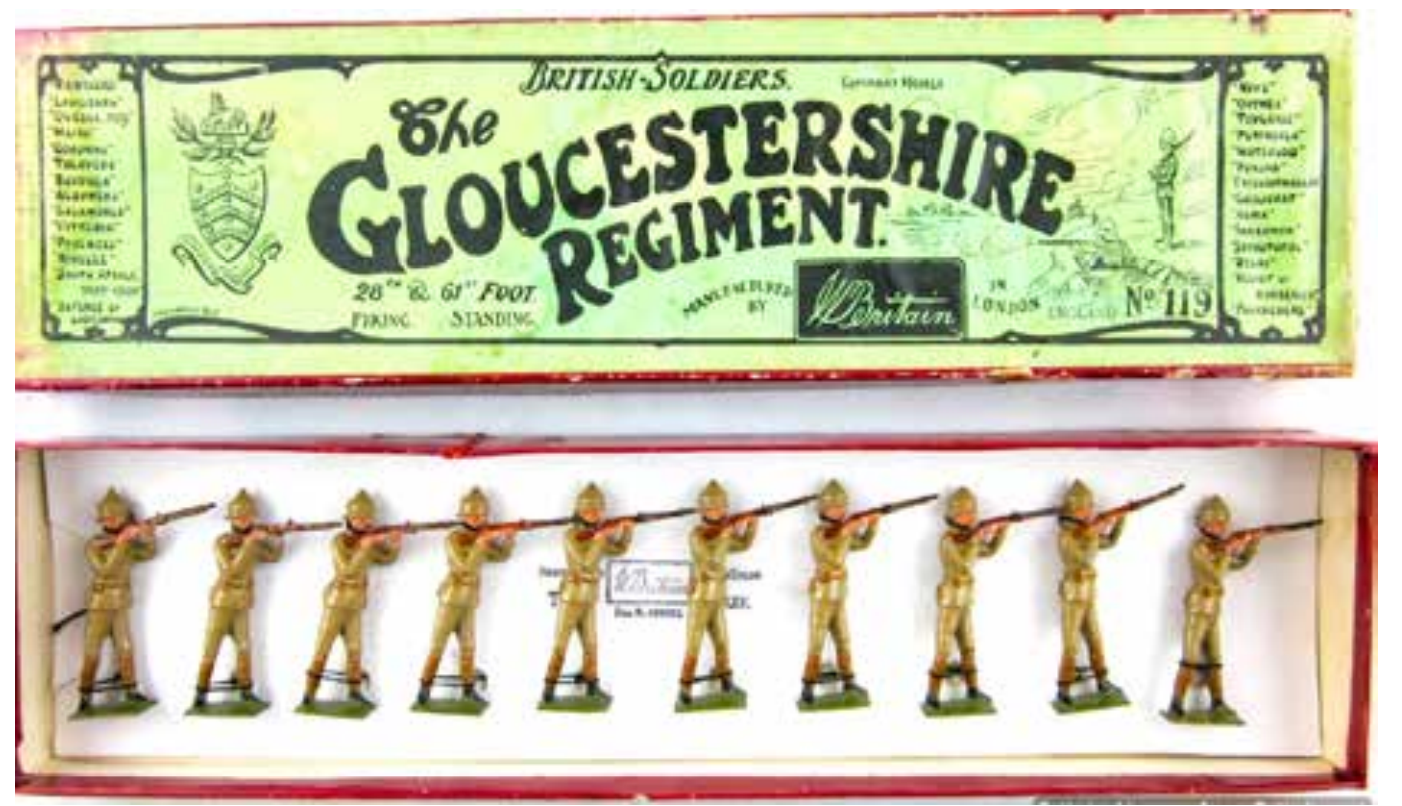
The Gloucestershire Regiment
The regiment was raised in October 1899. The 1st Battalion fought in the Cape Colony and Natal, including the defence of Ladysmith. The regiment fought in later campaigns before undertaking garrison duties in India and Malta after the war.
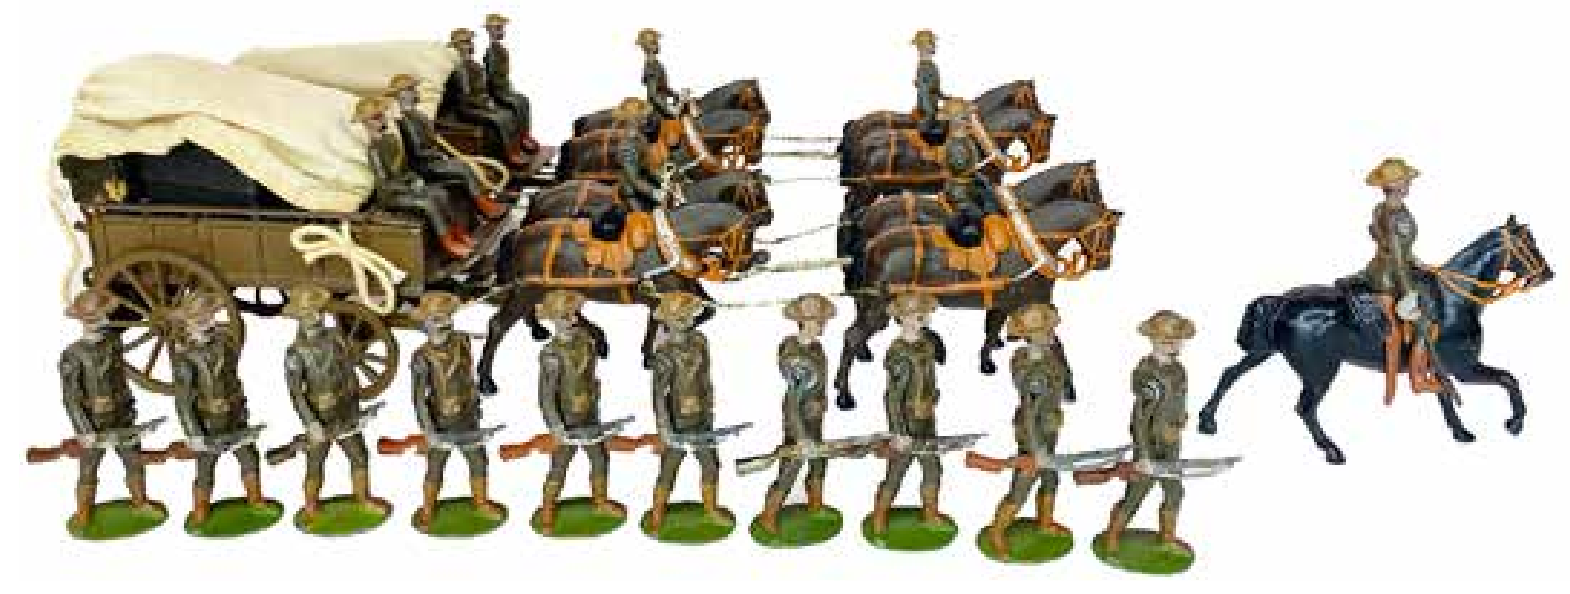
Royal Army Service Corps – Army Supply Column
Not sold directly by Britains, this set was not given a designated catalogue number or included in Britains standard listings. The item was sold exclusively by wholesaler C.F. Eckhardt and Co.
Column set
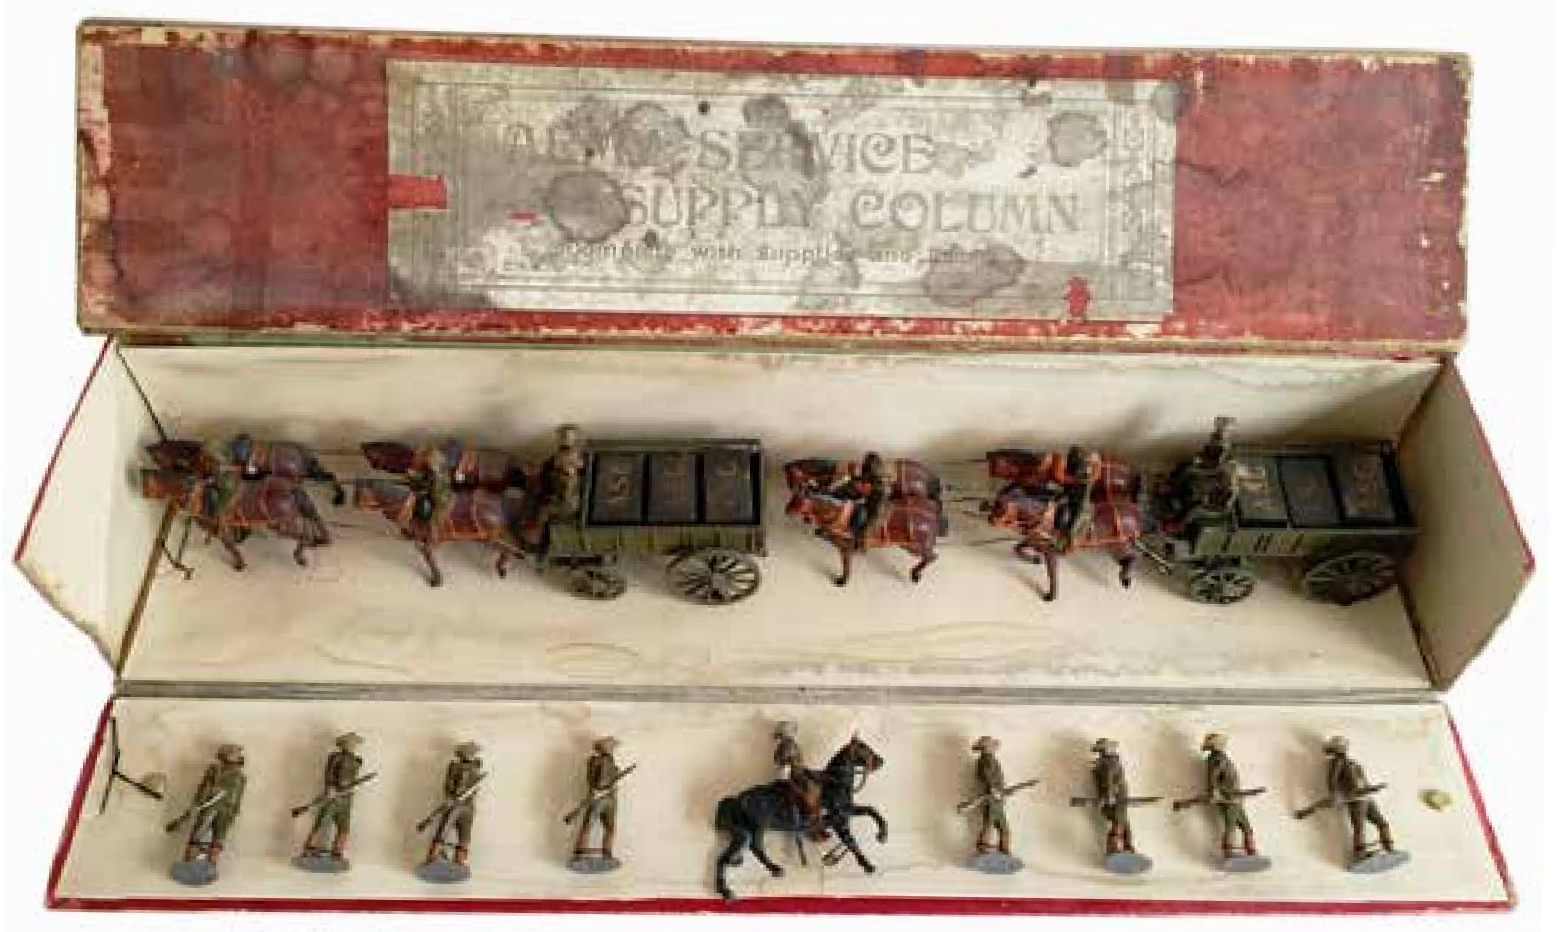
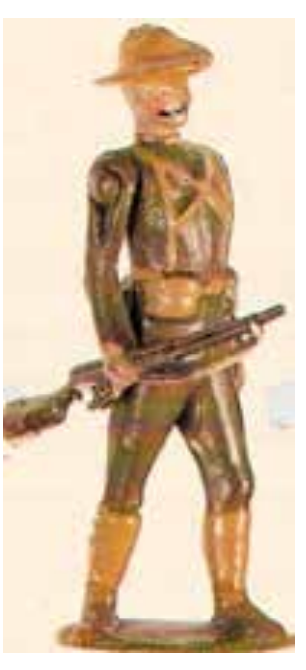
as an escort for the wagons in the
Army Supply Column set (it involved
a head change from other listed sets
marketed by them)
Royal Artillery
Britains did not issue any standard size figure sets representing the Royal Artillery during the Boer War. Two sets were introduced that are worthy of mention.
Set #126b, Royal Horse Artillery was a variation of the smaller scale set, but now in Active Service Dress. This set of smaller ‘b size’ figures was issued in 1902. A more modern version replaced the toy
like gun with open spring in 1932. The set continued in this form until 1939.
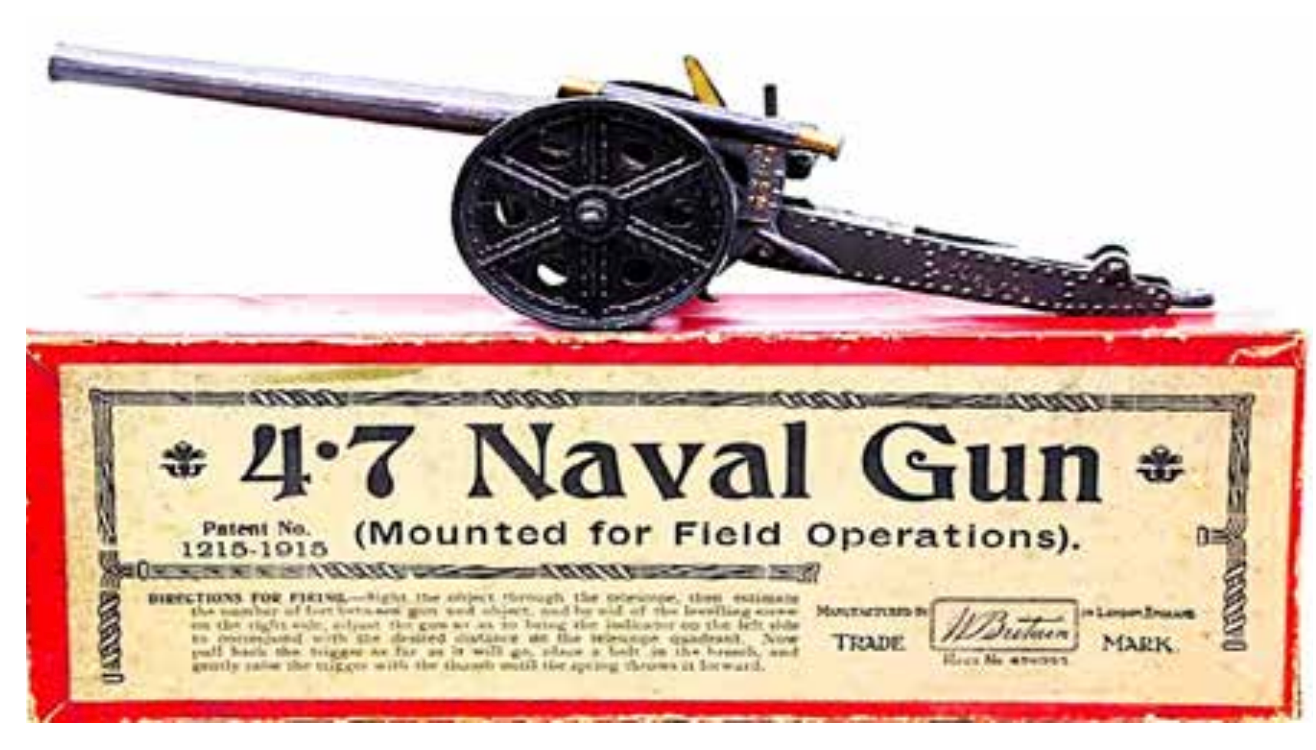
The other set introduced around this time was the 4.7” Naval gun. Although the 4.7” gun played only a relatively small part in the war, its use captured the public’s imagination. It figured prominently in the Britains range for over 70 years, as illustrated in the accompanying article by Norman Joplin in this issue.
Norman’s article covers later versions and the different packaging used to distribute the gun. The example illustrated here, with open spring, would have been produced between 1902 and 1916. Initially it had no Set number. After 1934 the set number 1264 was included on the packaging. It has a Patent No. 1215-1915 on the box, indicating the open spring. This differs from the original registered design number 388707 and the Patent No 20775 as mentioned in Norman’s article.
The 4.7” gun has also been represented by many other makers as well as those keen to fill gaps that they feel Britains should have filled, such as the version by Bill O’Brien illustrated here.
A follow-up article regarding the use of artillery in the Boer war by both sides is planned for a future issue.

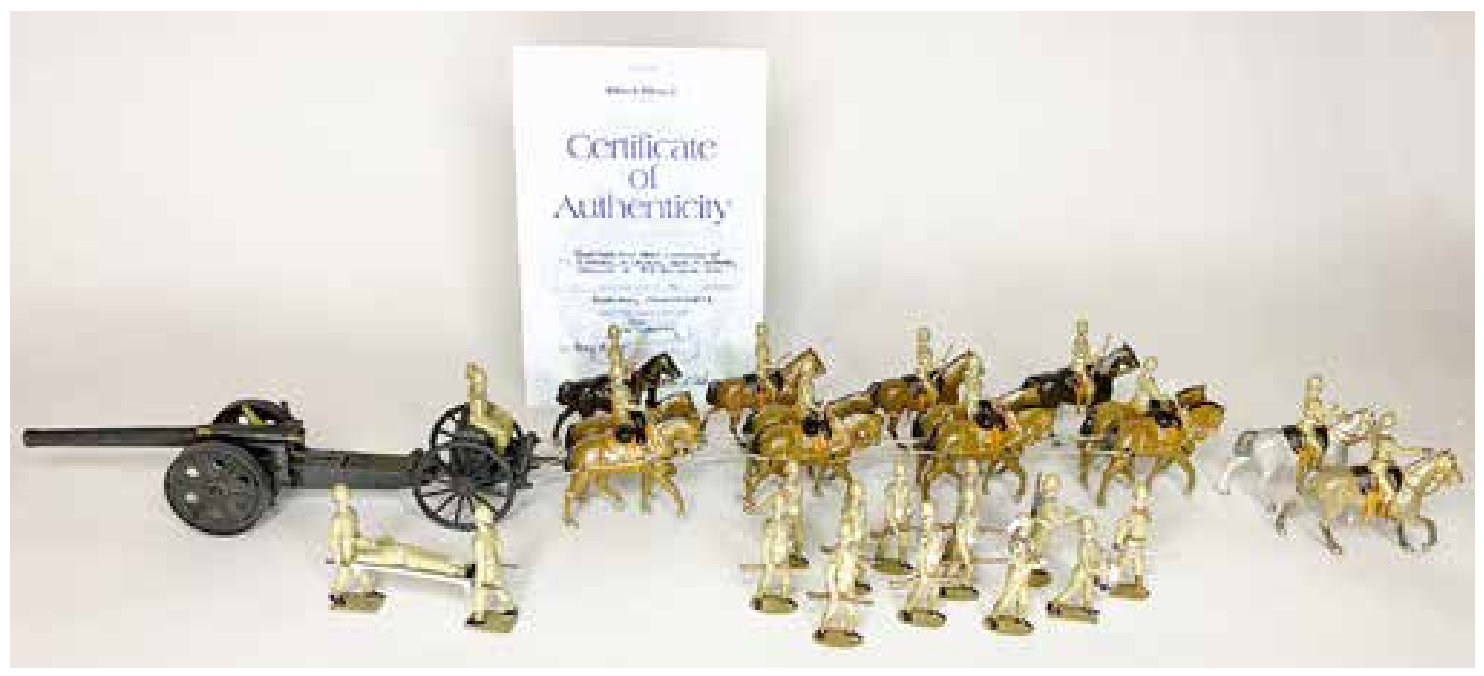
dated 1901-2, with certificate of authenticity included)
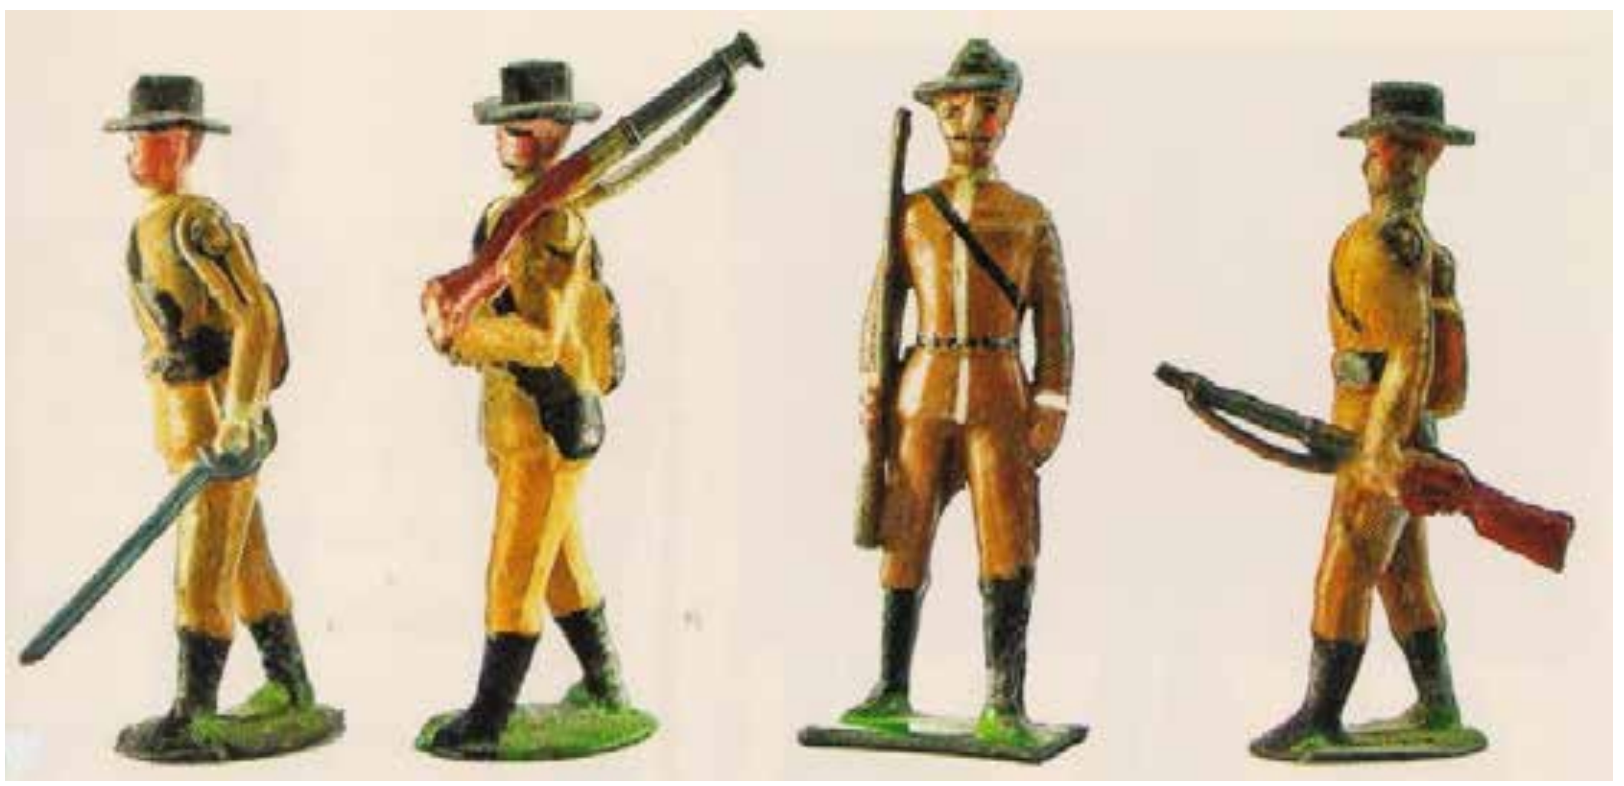
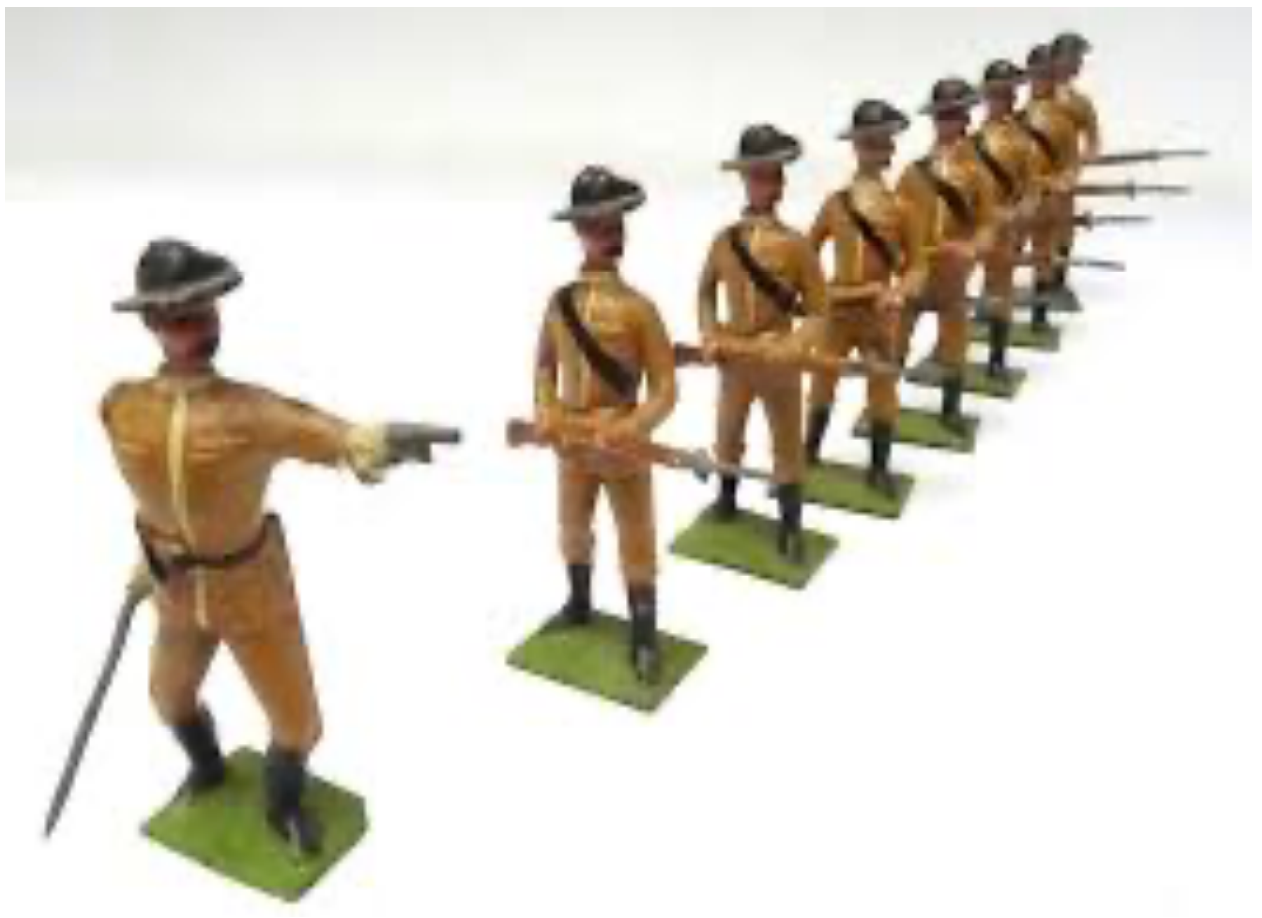
The Boers
The first version of Set #26 used the same casting as Set 91, American infantry, with a simple change in paint finish. Later versions used other castings but are all rare. The set was not available after 1910.
In 1906 a new version with square based figures using the ‘’on guard’’ figure with fixed bayonet and an officer with drawn sword and pistol were briefly offered.
The photographs accompanying this article are from Joe Wallis’s Soldiers of Greater Britain book and the Old Toy Soldier Auctions archives. Joe’s pictures are used with his permission.
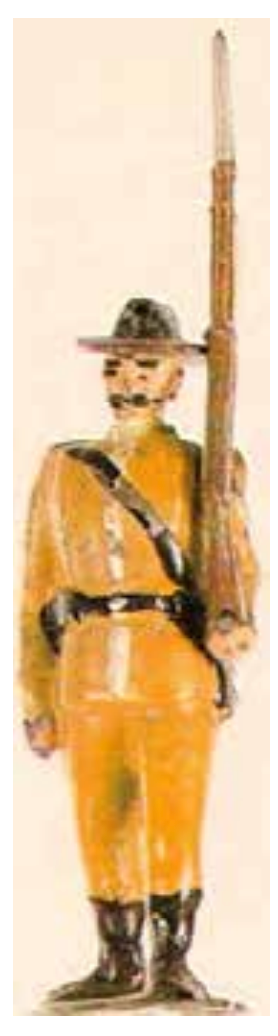
This figure is often found with the
bayonet clipped off (unlike this example); the Boers did not use bayonets
and generally did not engage in close
quarter fighting